Mid-Grey Is the new Black

Have you noticed Grey is everywhere at the moment? I'm thinking this trend has kind of snuck up on UK homeowners - personally I'm liking it alot but at the same time feeling a little overwhelmed as  I can't quite put my finger on when it became the colour de jour for period makeover's.

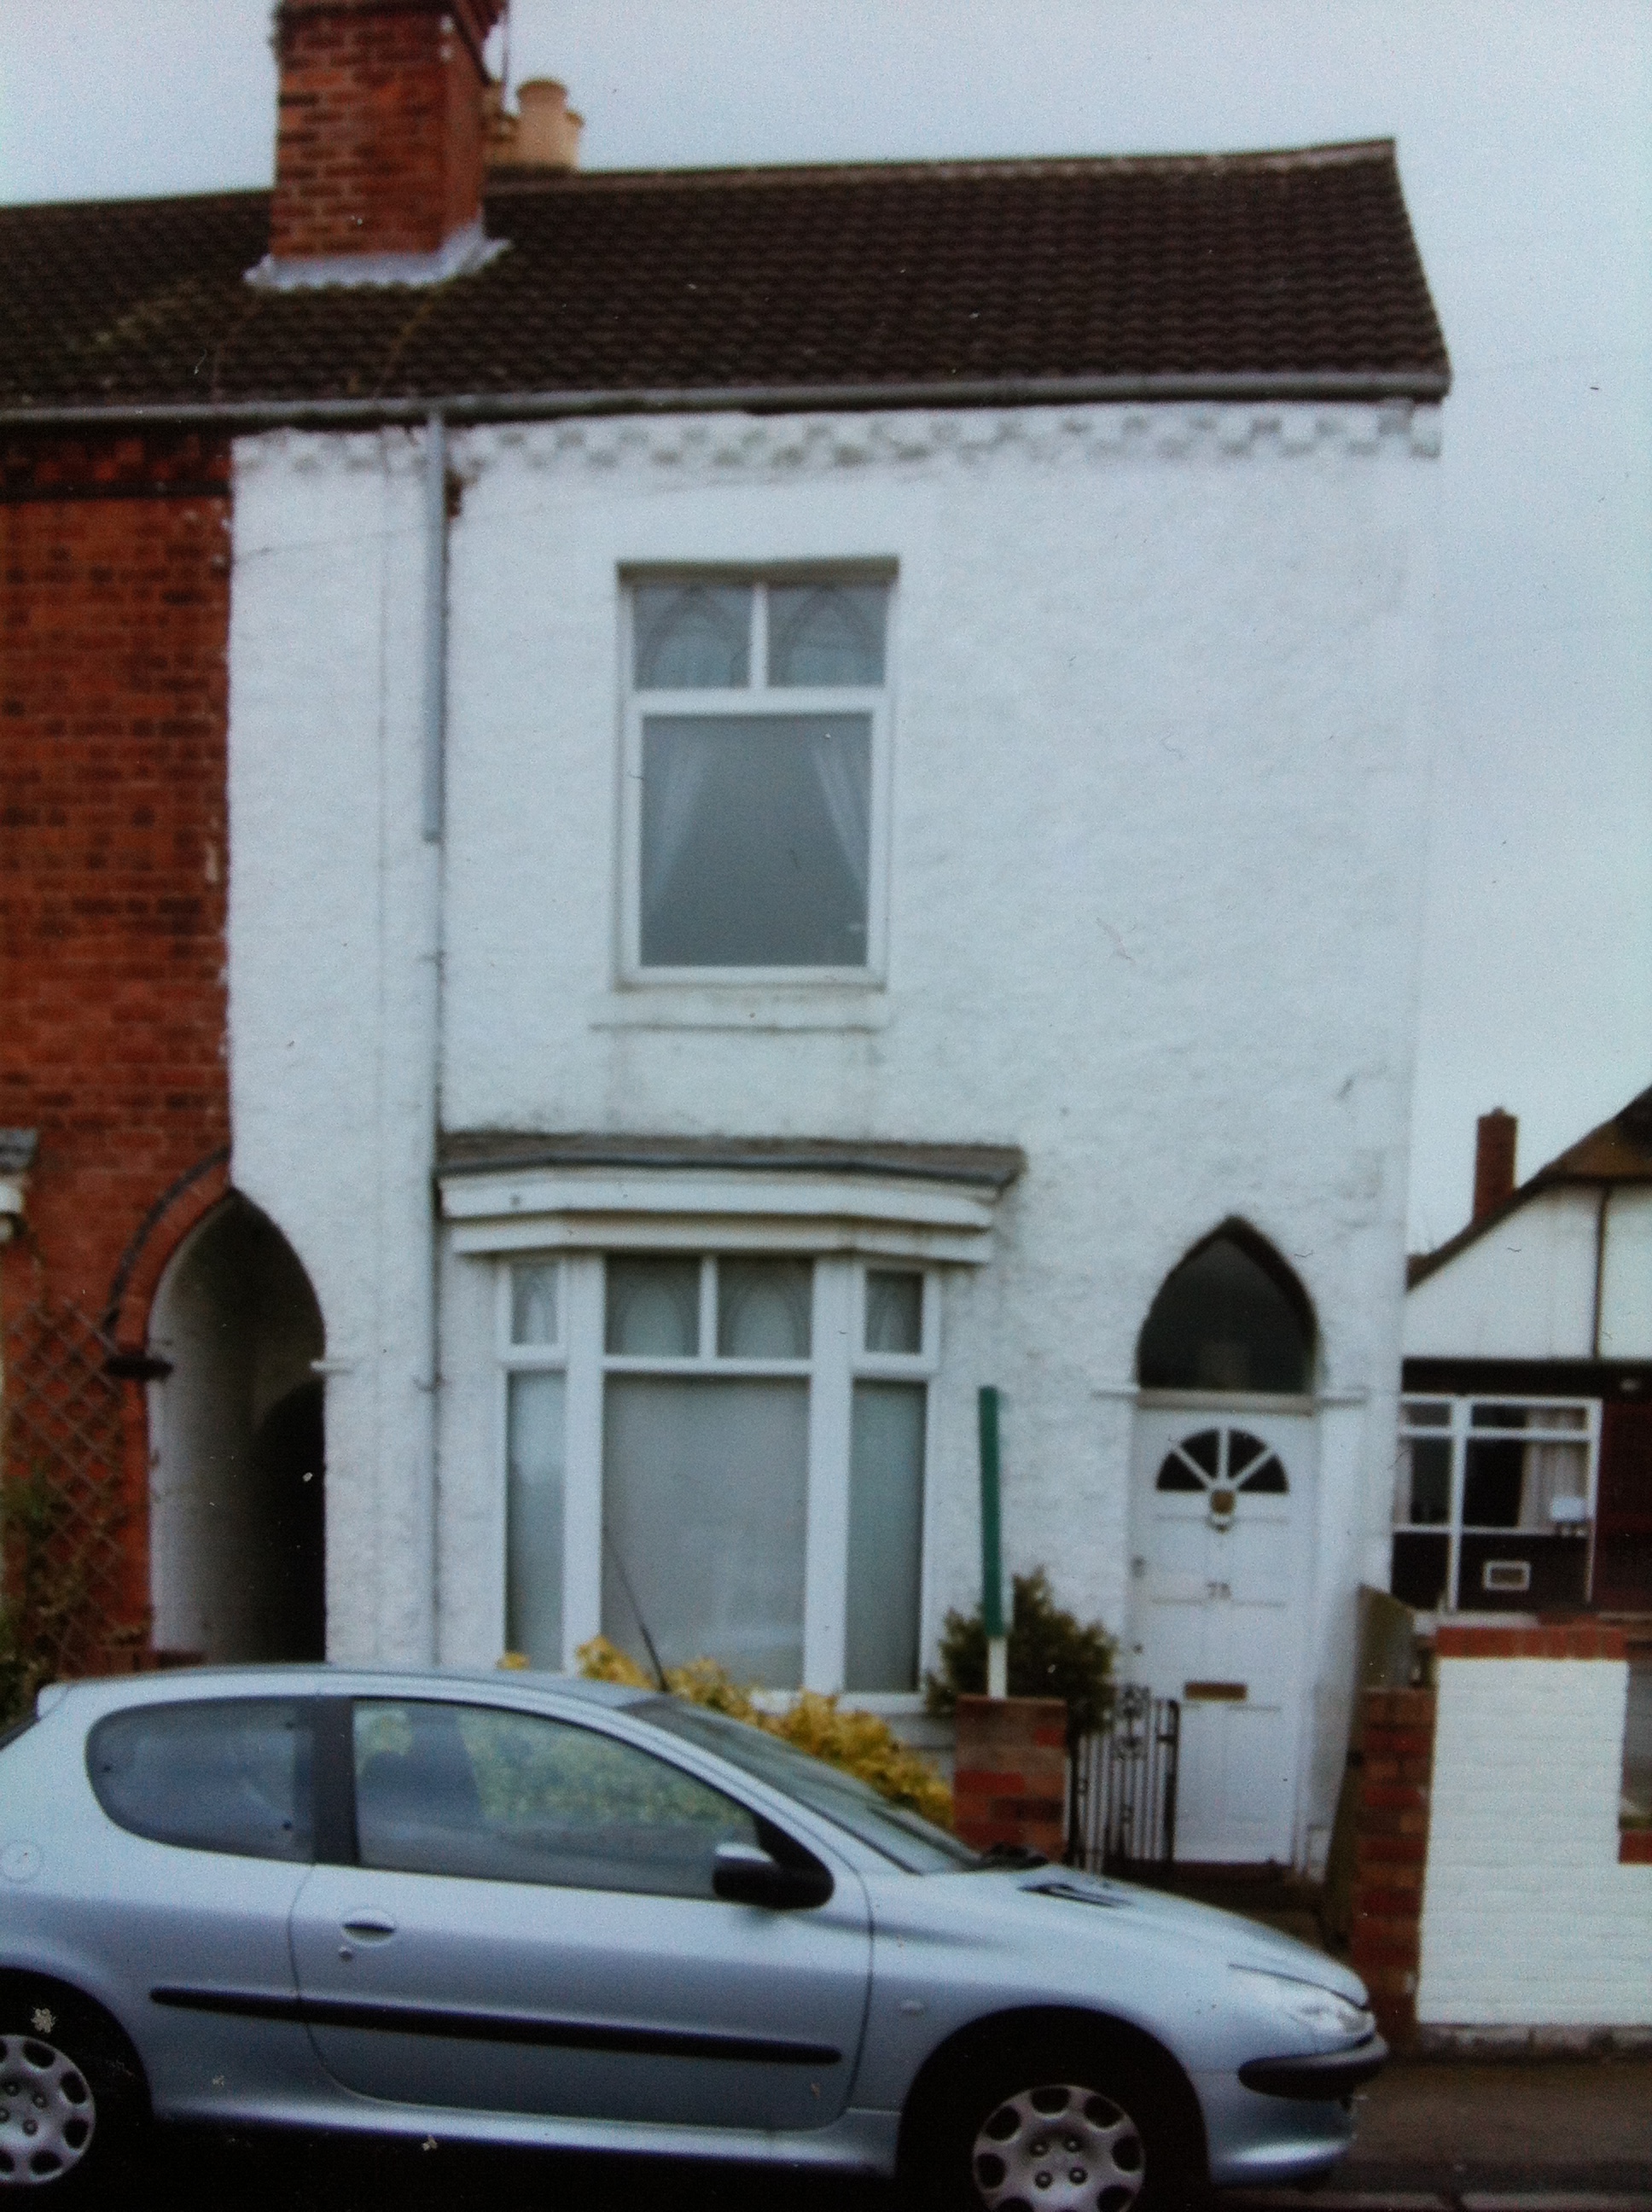
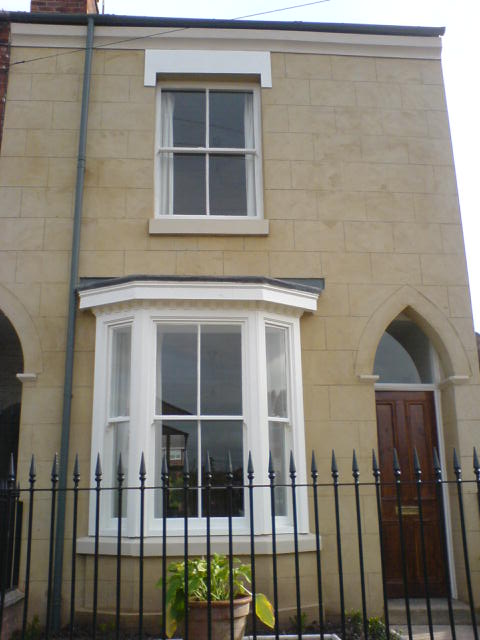
We took a trip out last week to our favorite restaurant in Kenilworth - the Clarendon Arms - and I had to admire this lovely part-restoration/makeover of a home just across the road from the castle. Although an interesting shape, it never really caught the eye before - I think maybe painted in emerald green and white - but now, wow, beautiful mid-grey ballustrading and matching doors + windows.

Grey goes with most colours, and is fantastic when contrasted with a vivid accent - pink, lime green, or pastels like pale blue, mint green etc - and this is why it's a really excellent colour to choose at the moment to add value if you're thinking of selling, or just fancy a quick period home makeover - internally or externally. 

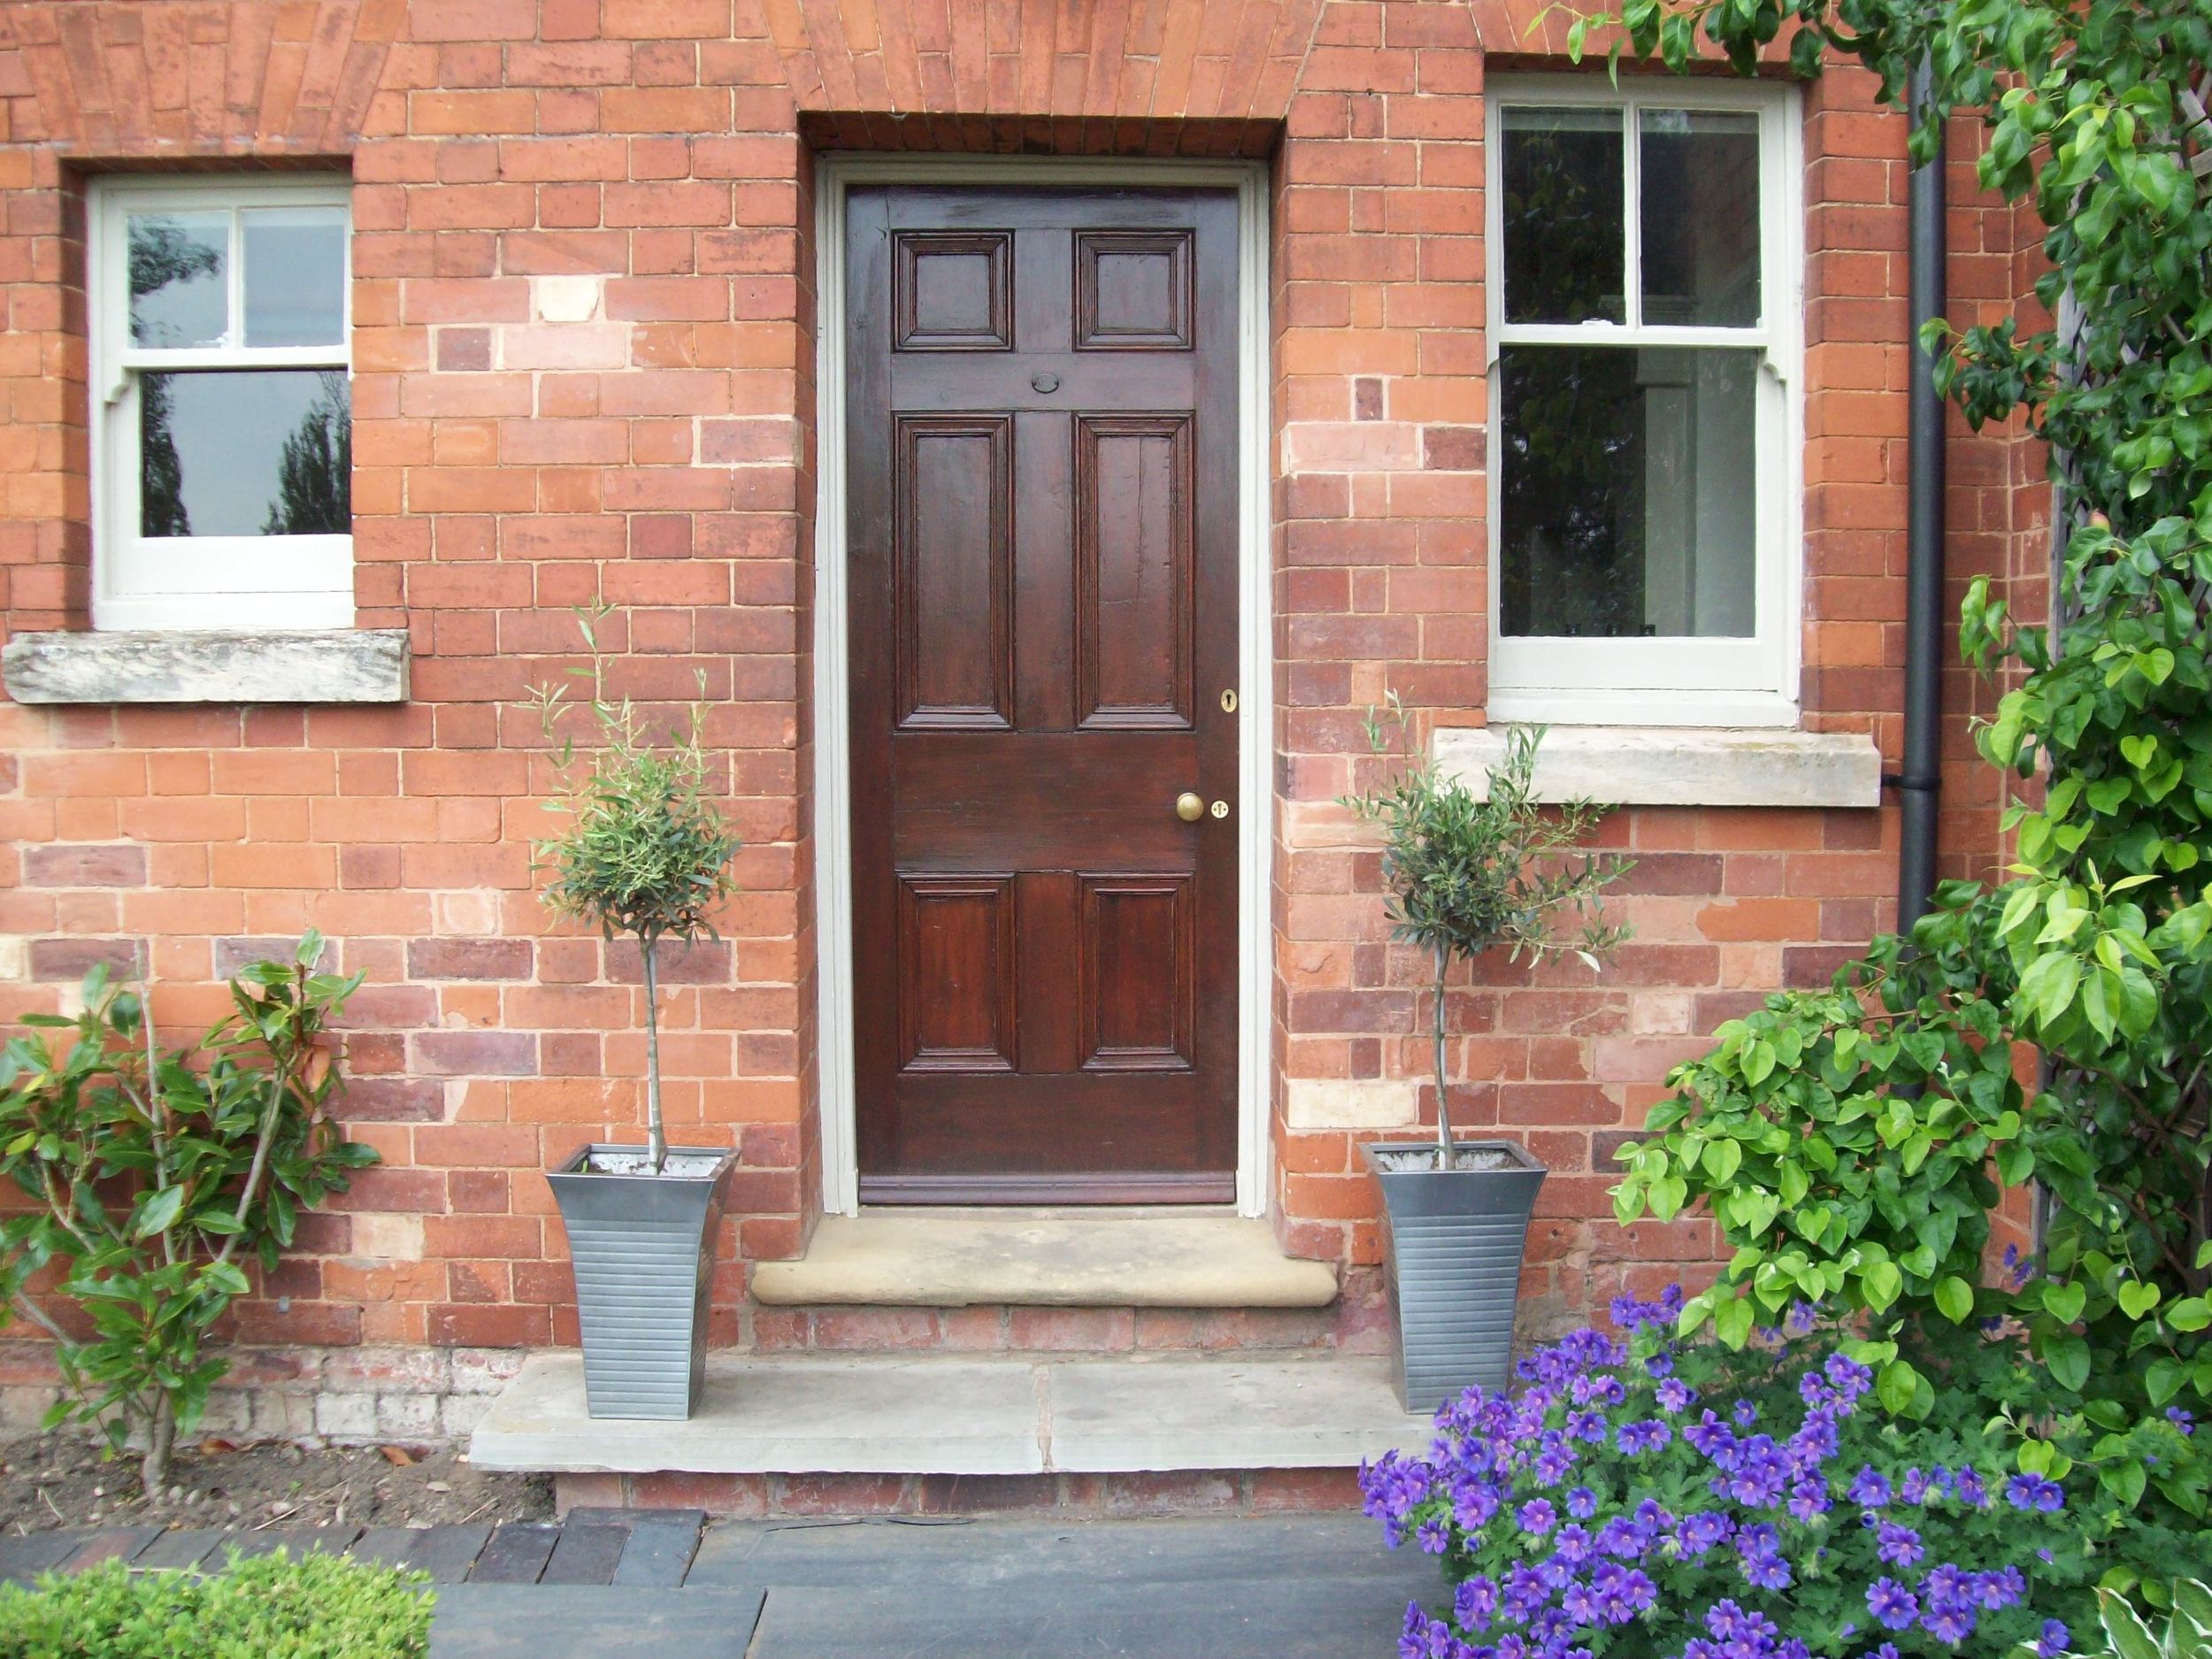
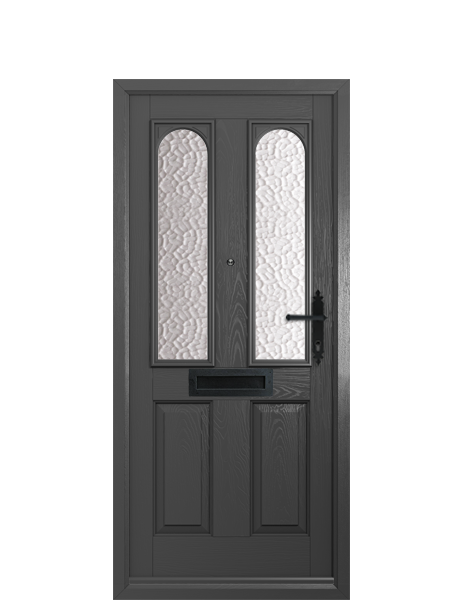
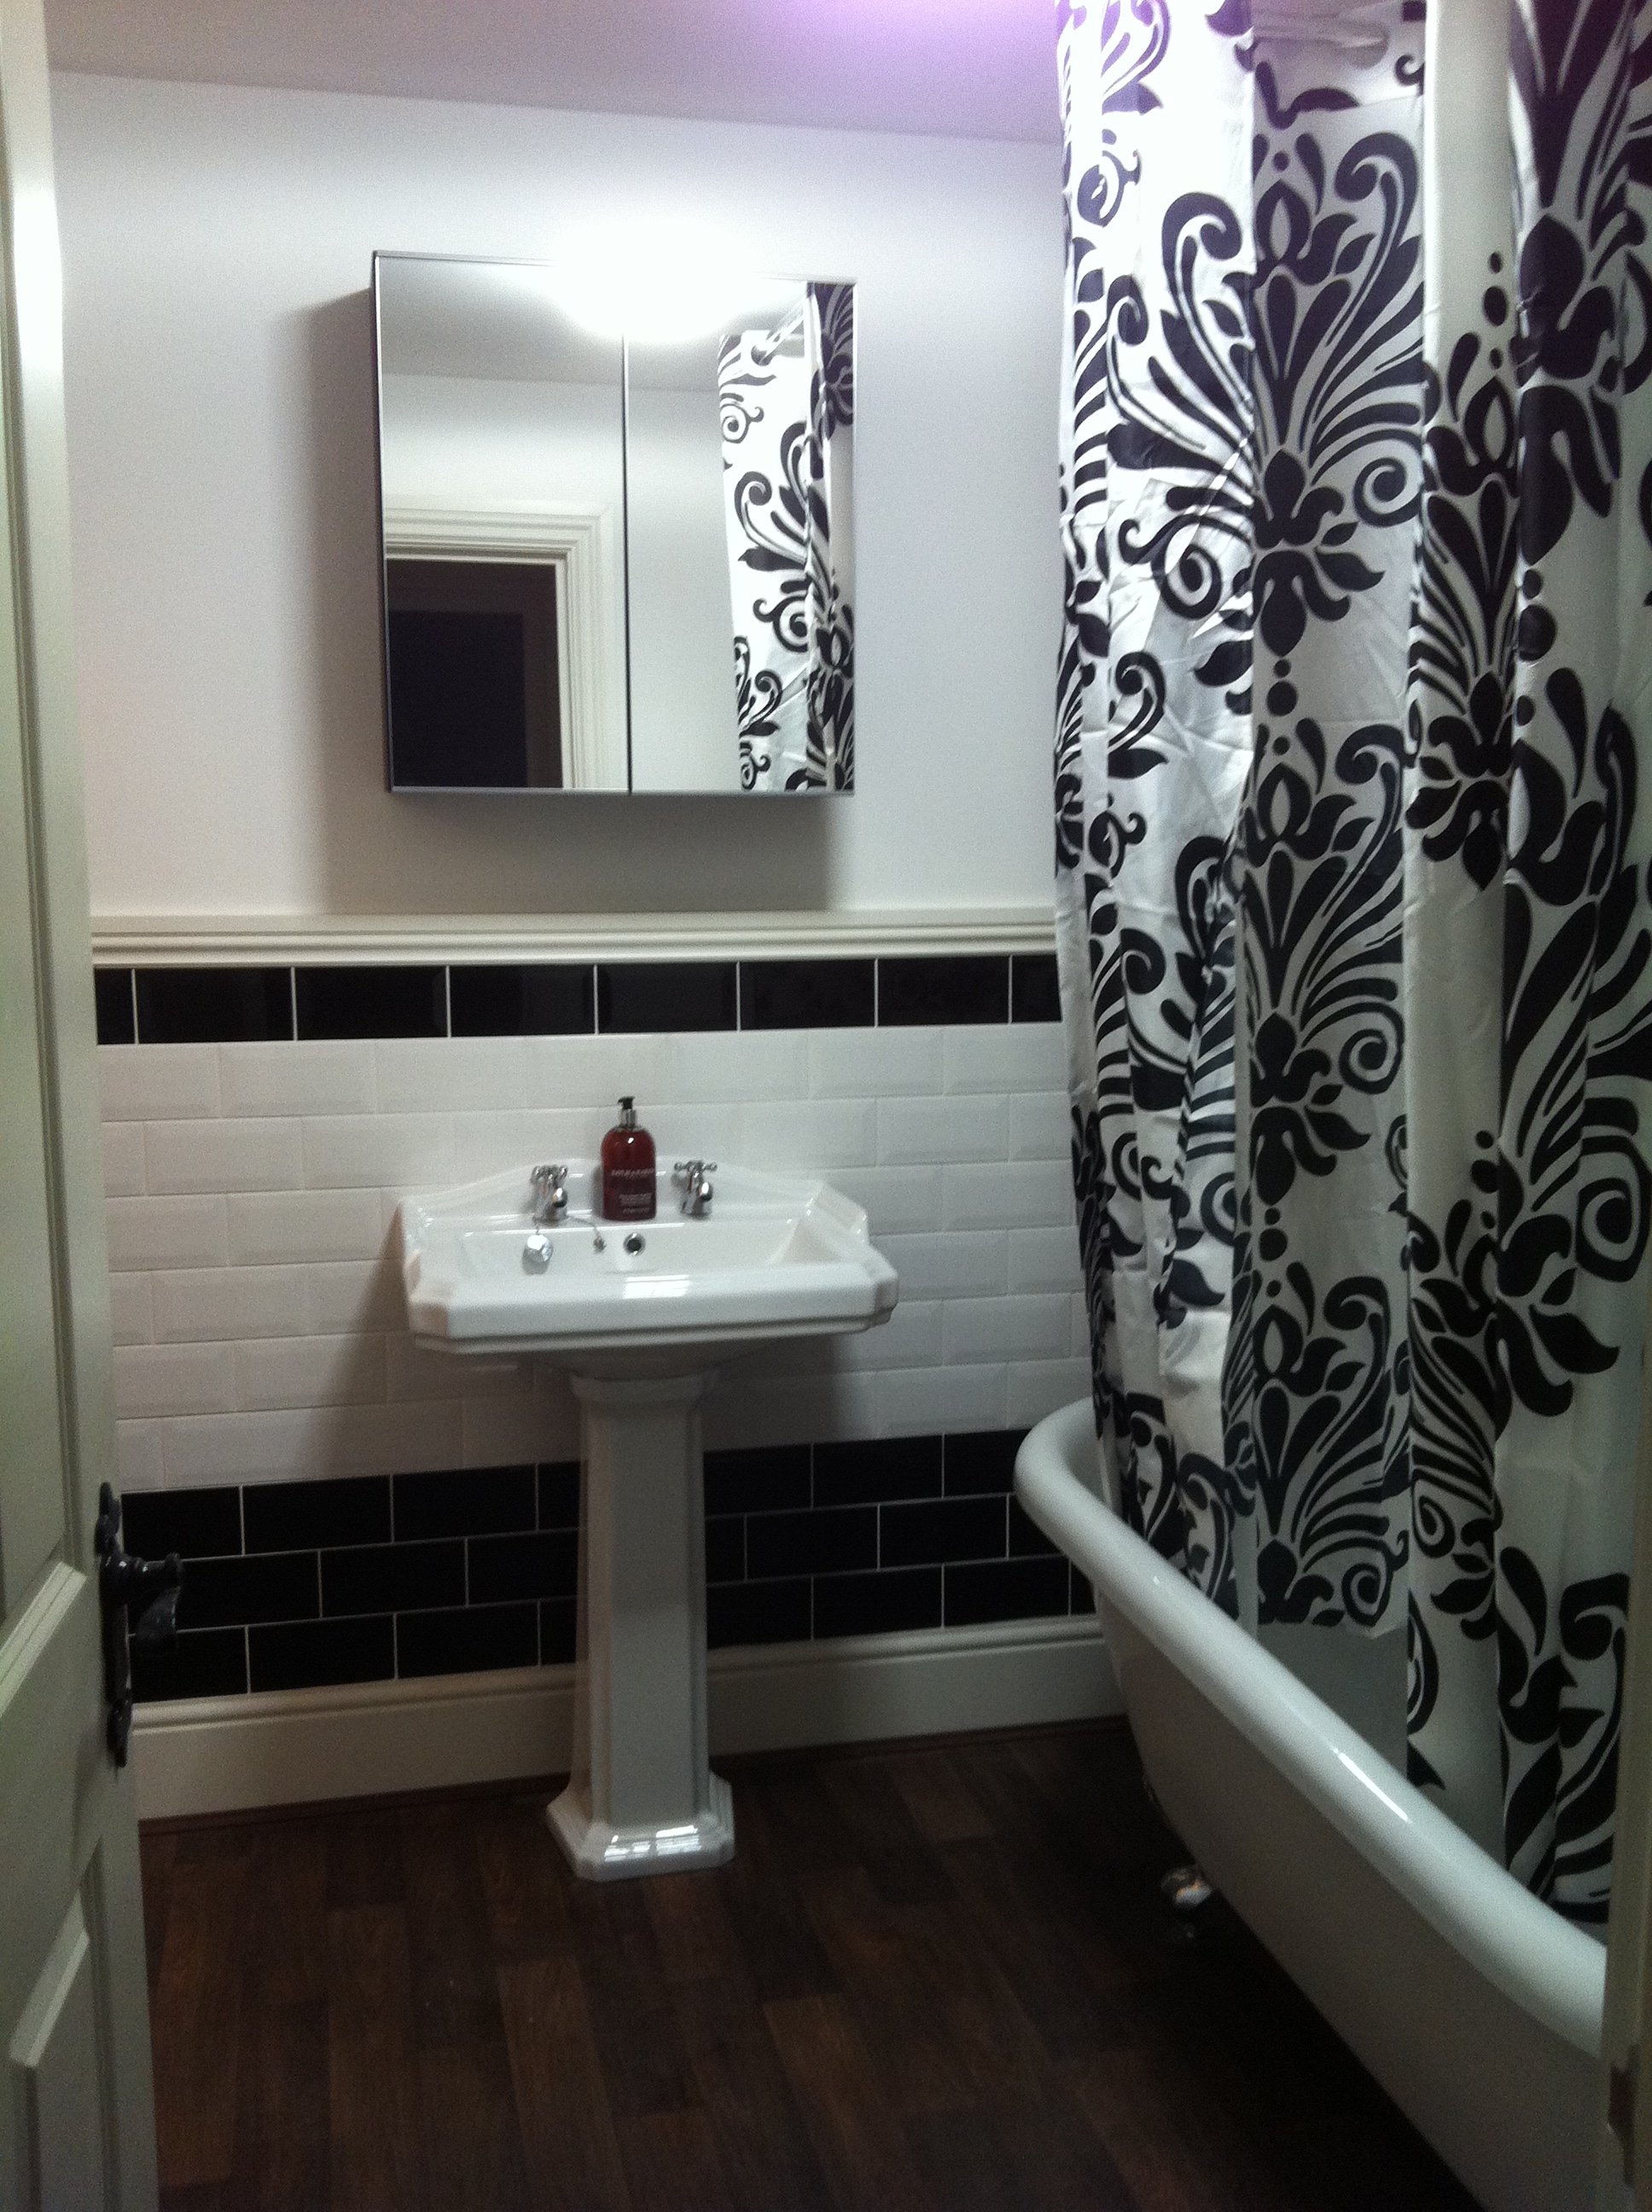
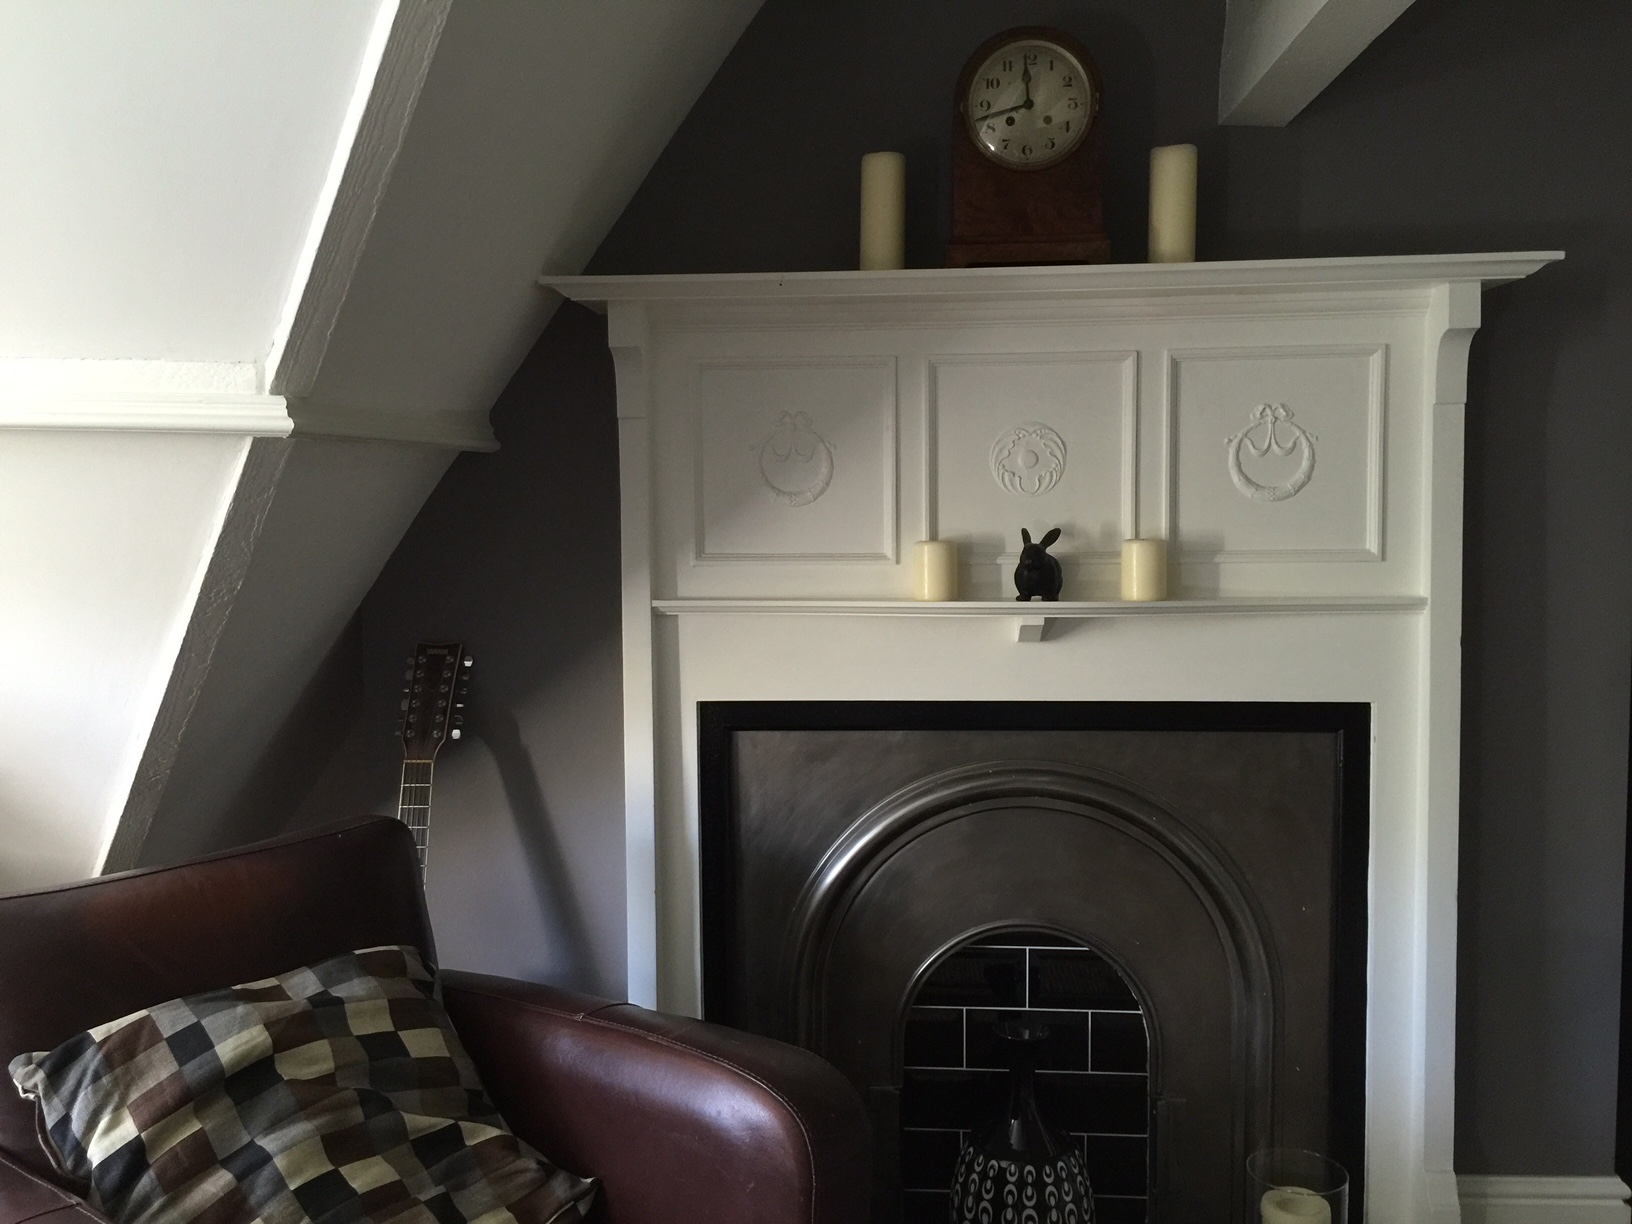
 My top tip is that grey looks best when used on a relatively small area with some detailing or a lighter colour to offset it, so maybe a front door/contrasting with a white timber door frame - or chimney breast/contrasting with pale fireplace surround (like in the photo below, of our sitting room) - make good places to start.

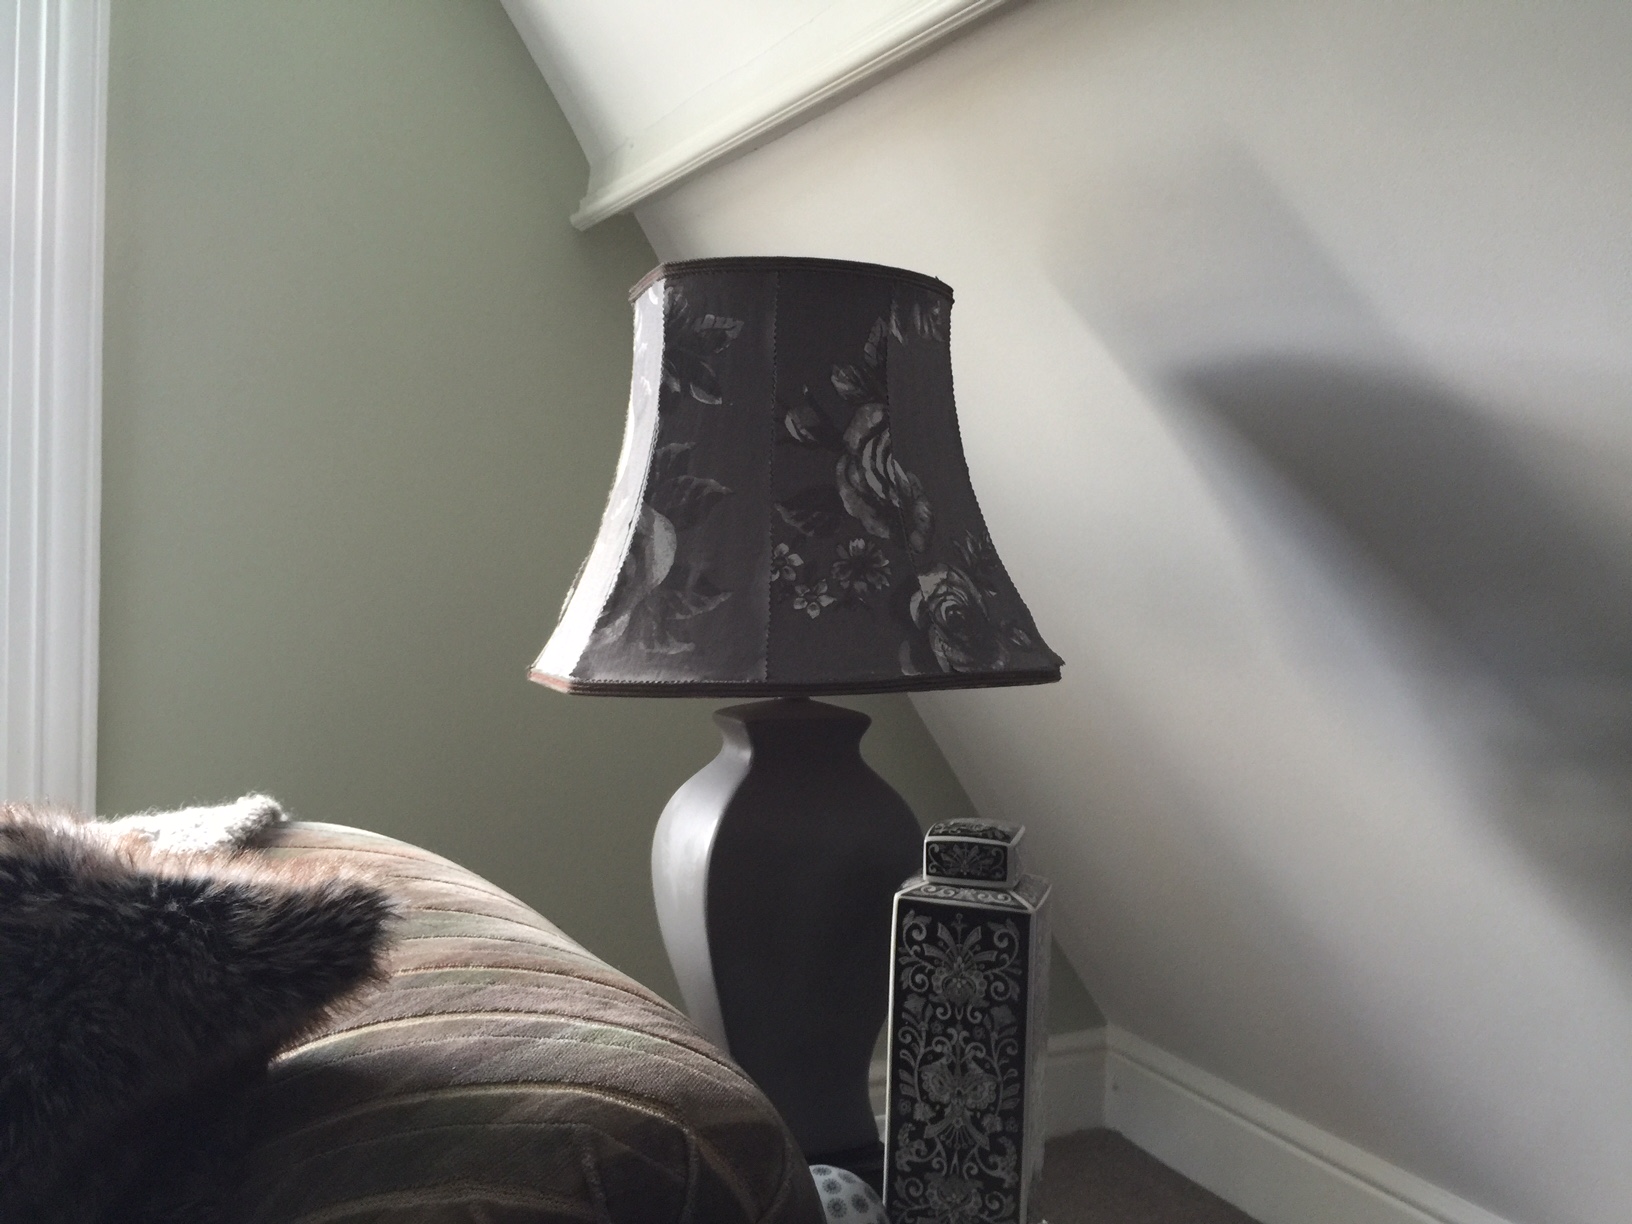
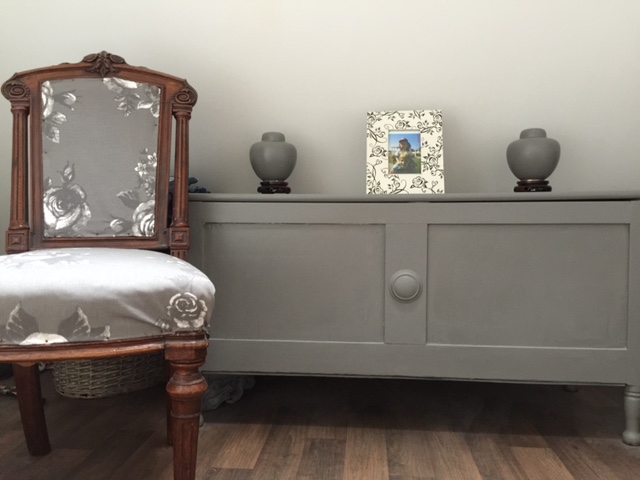
Going for a more modern look within our period apartment, I've recently given some bits and pieces around the place a quick once-over with a couple of different shades of mid-grey - and even used some grey/white damask fabric from Ikea to recover a chair and compliment the scheme. The re-invigorated junk shop lamp had a peach colour shade, with a brown, red and green base that didnt really go with anything - I used some fabric offcuts to recover the shade, and painted the base grey (second image, above).

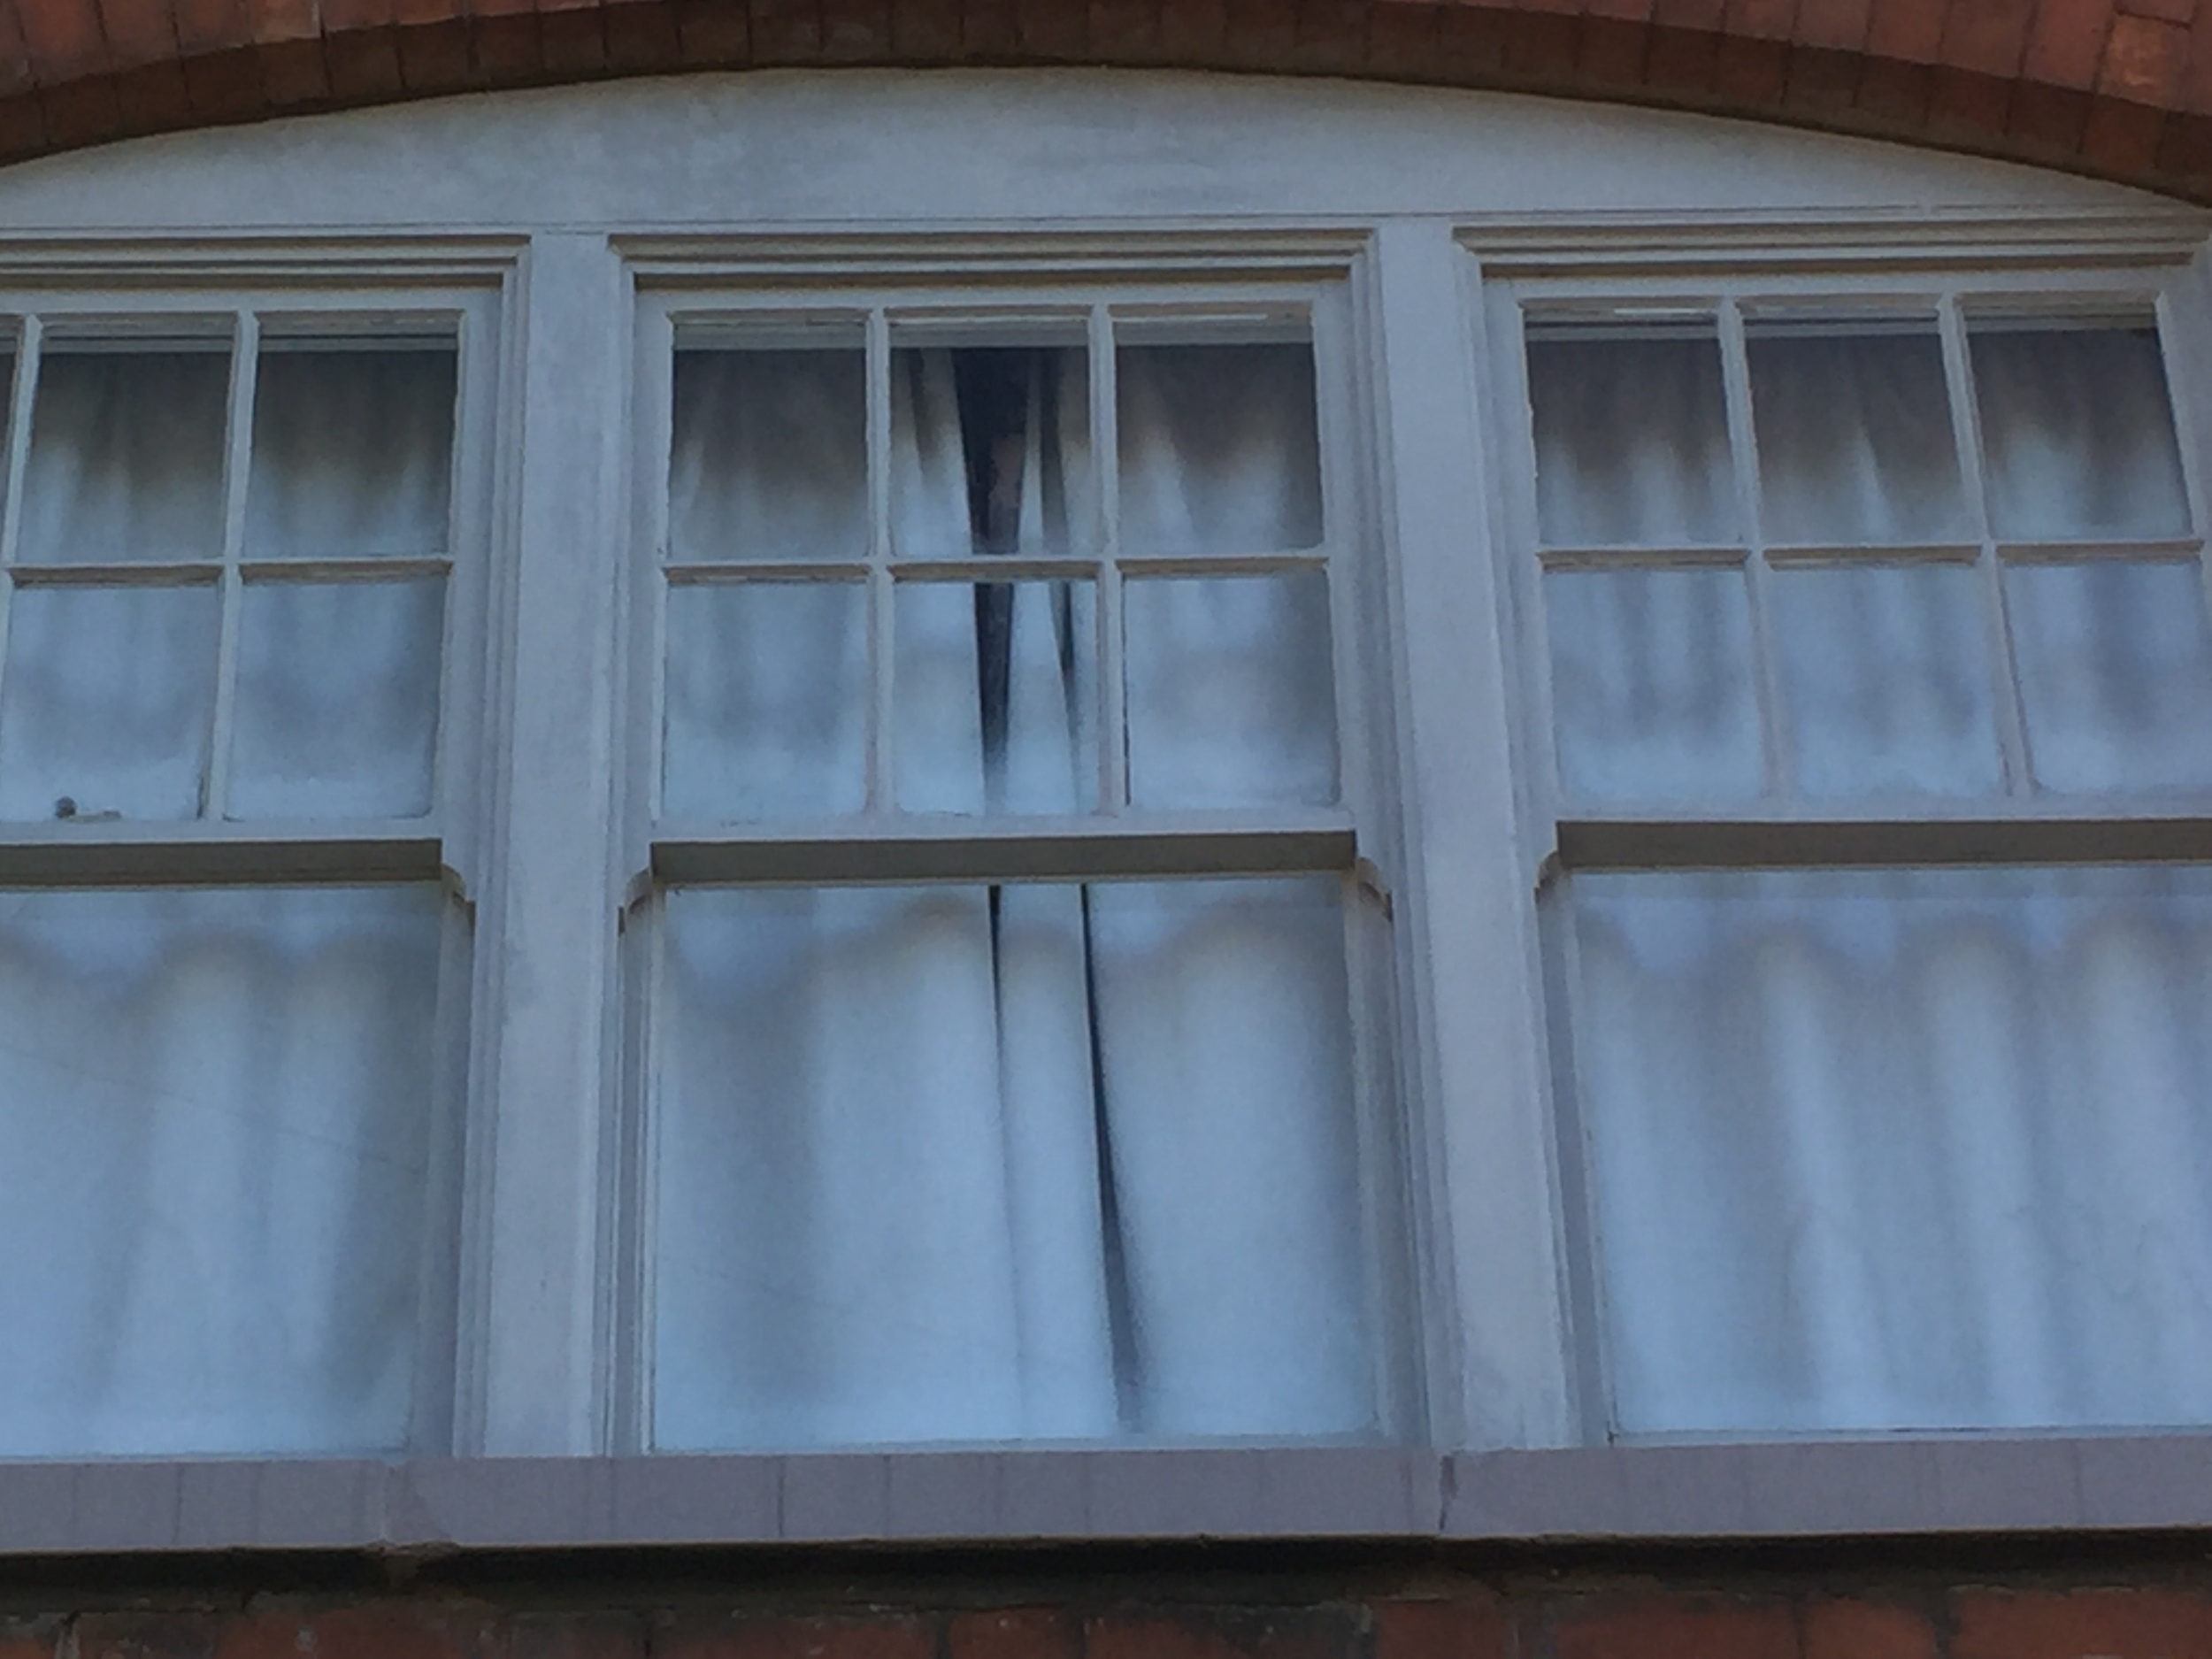
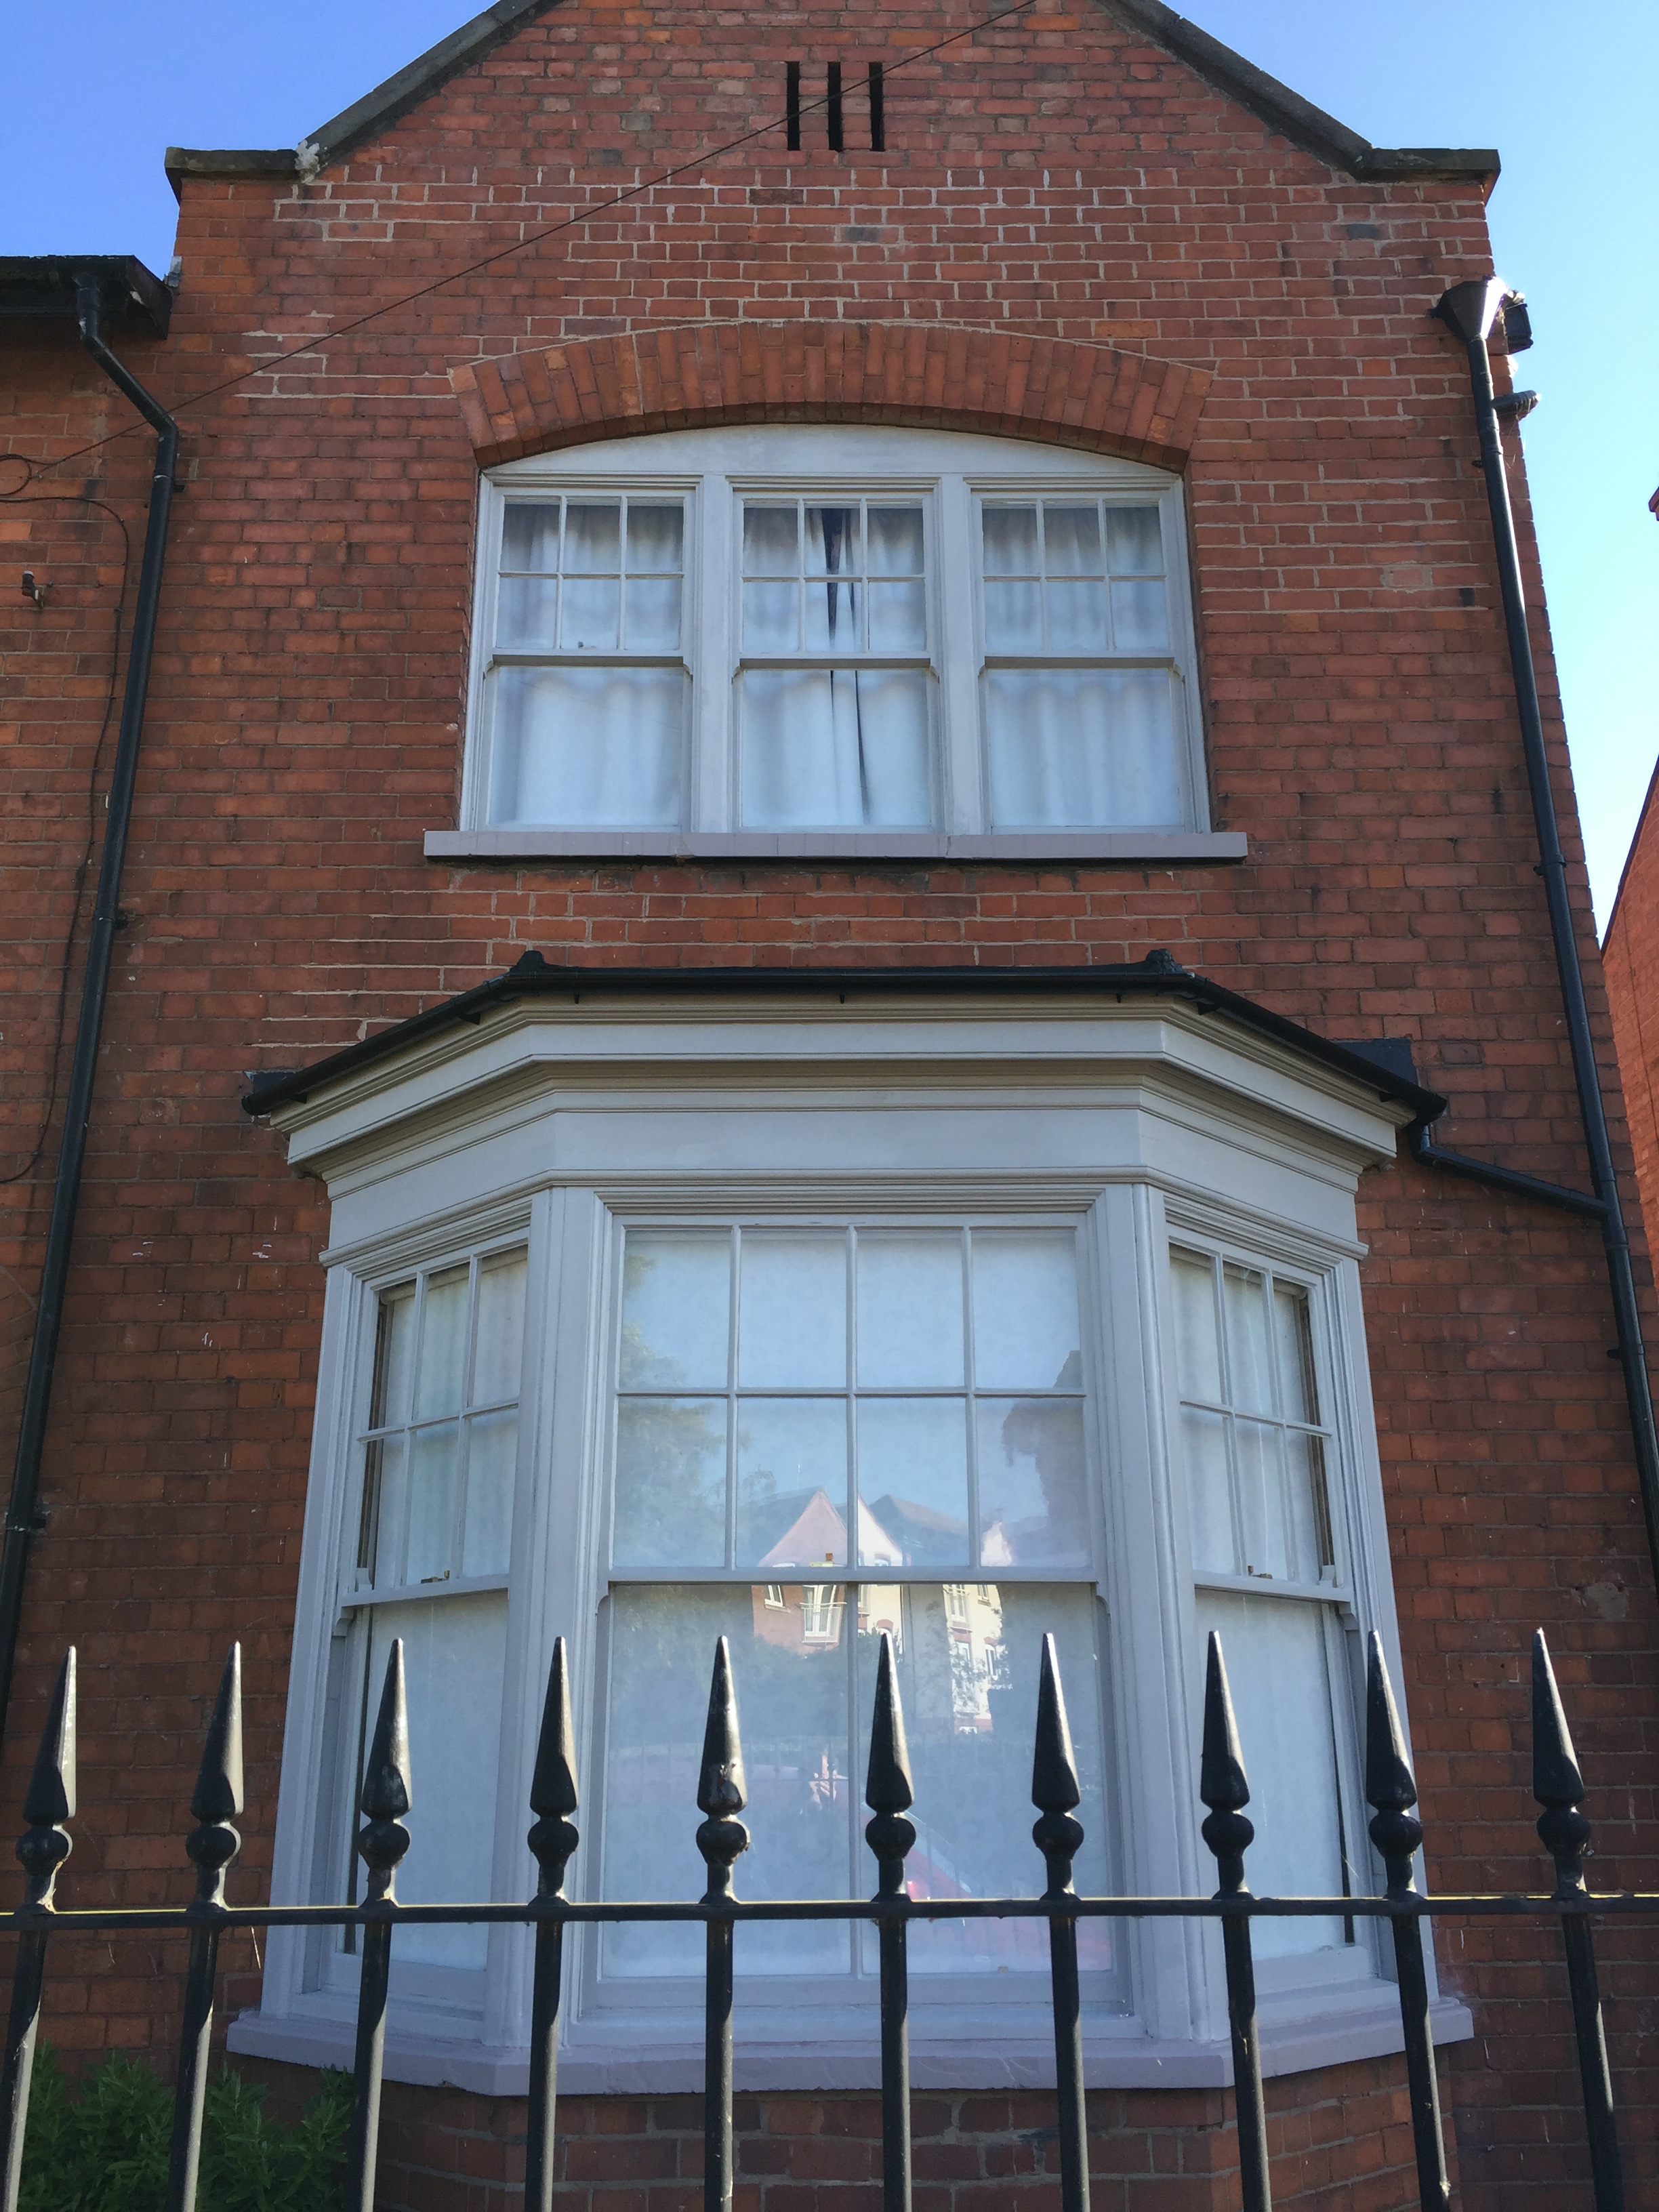
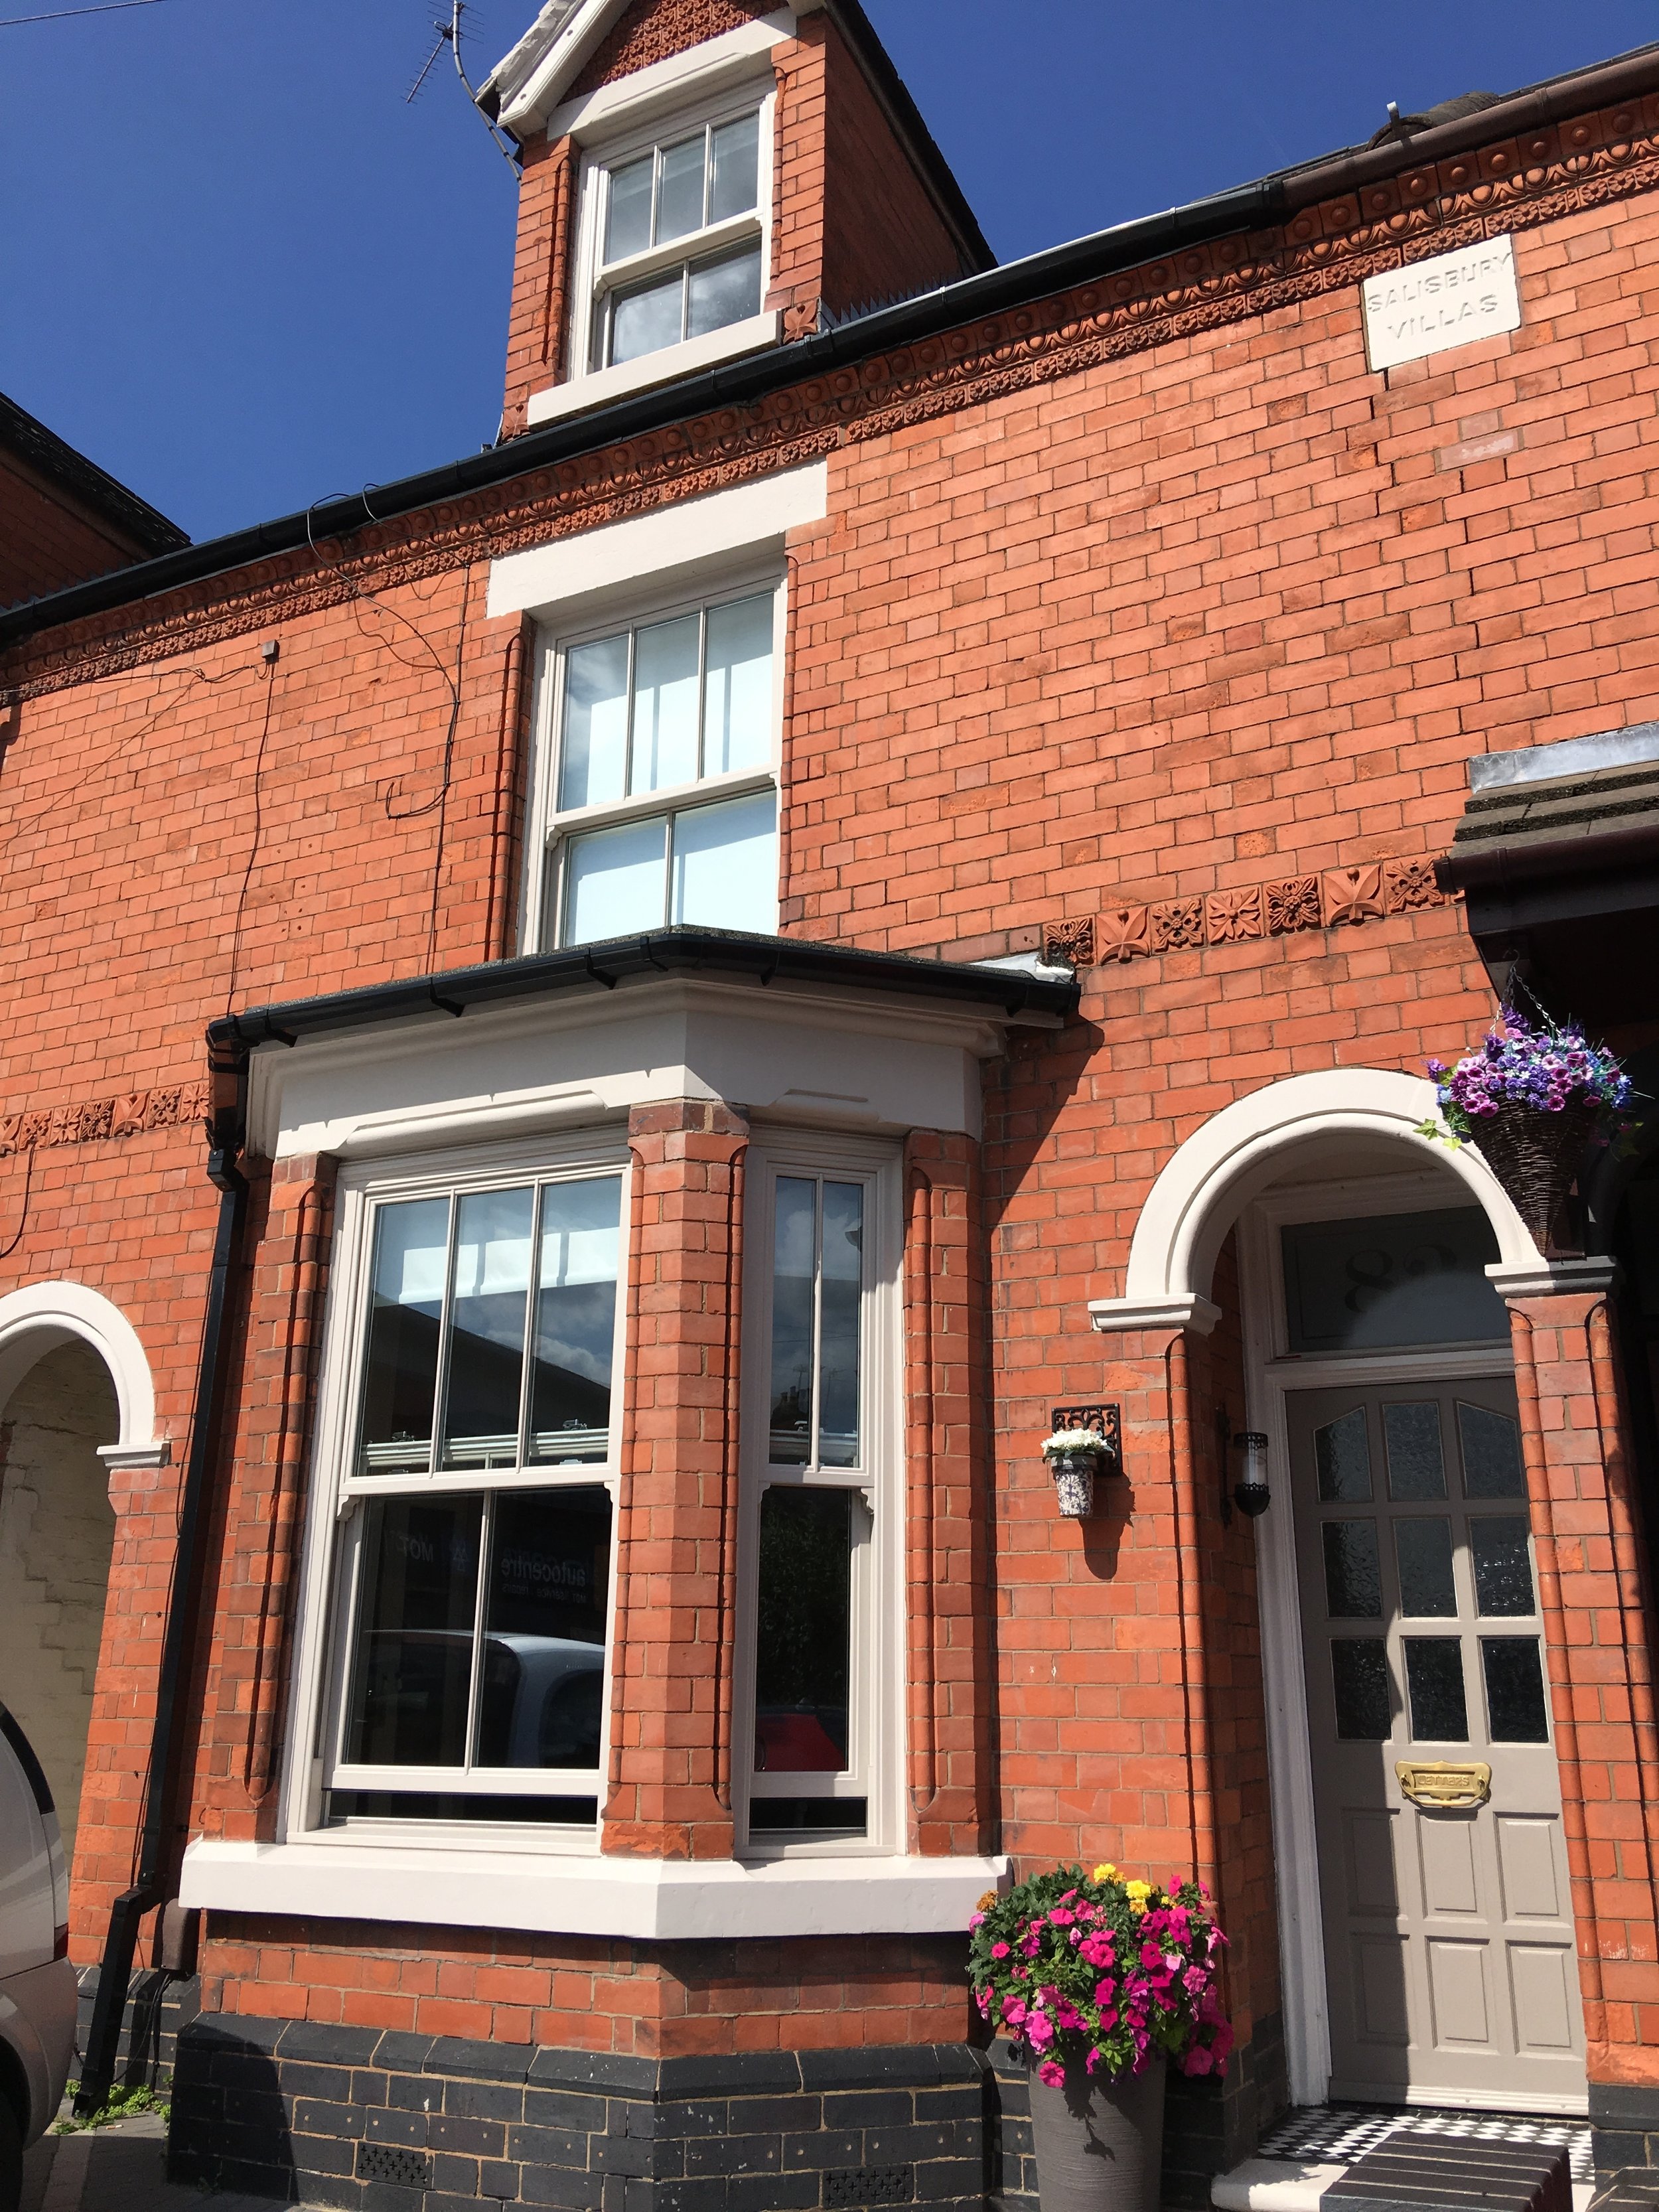
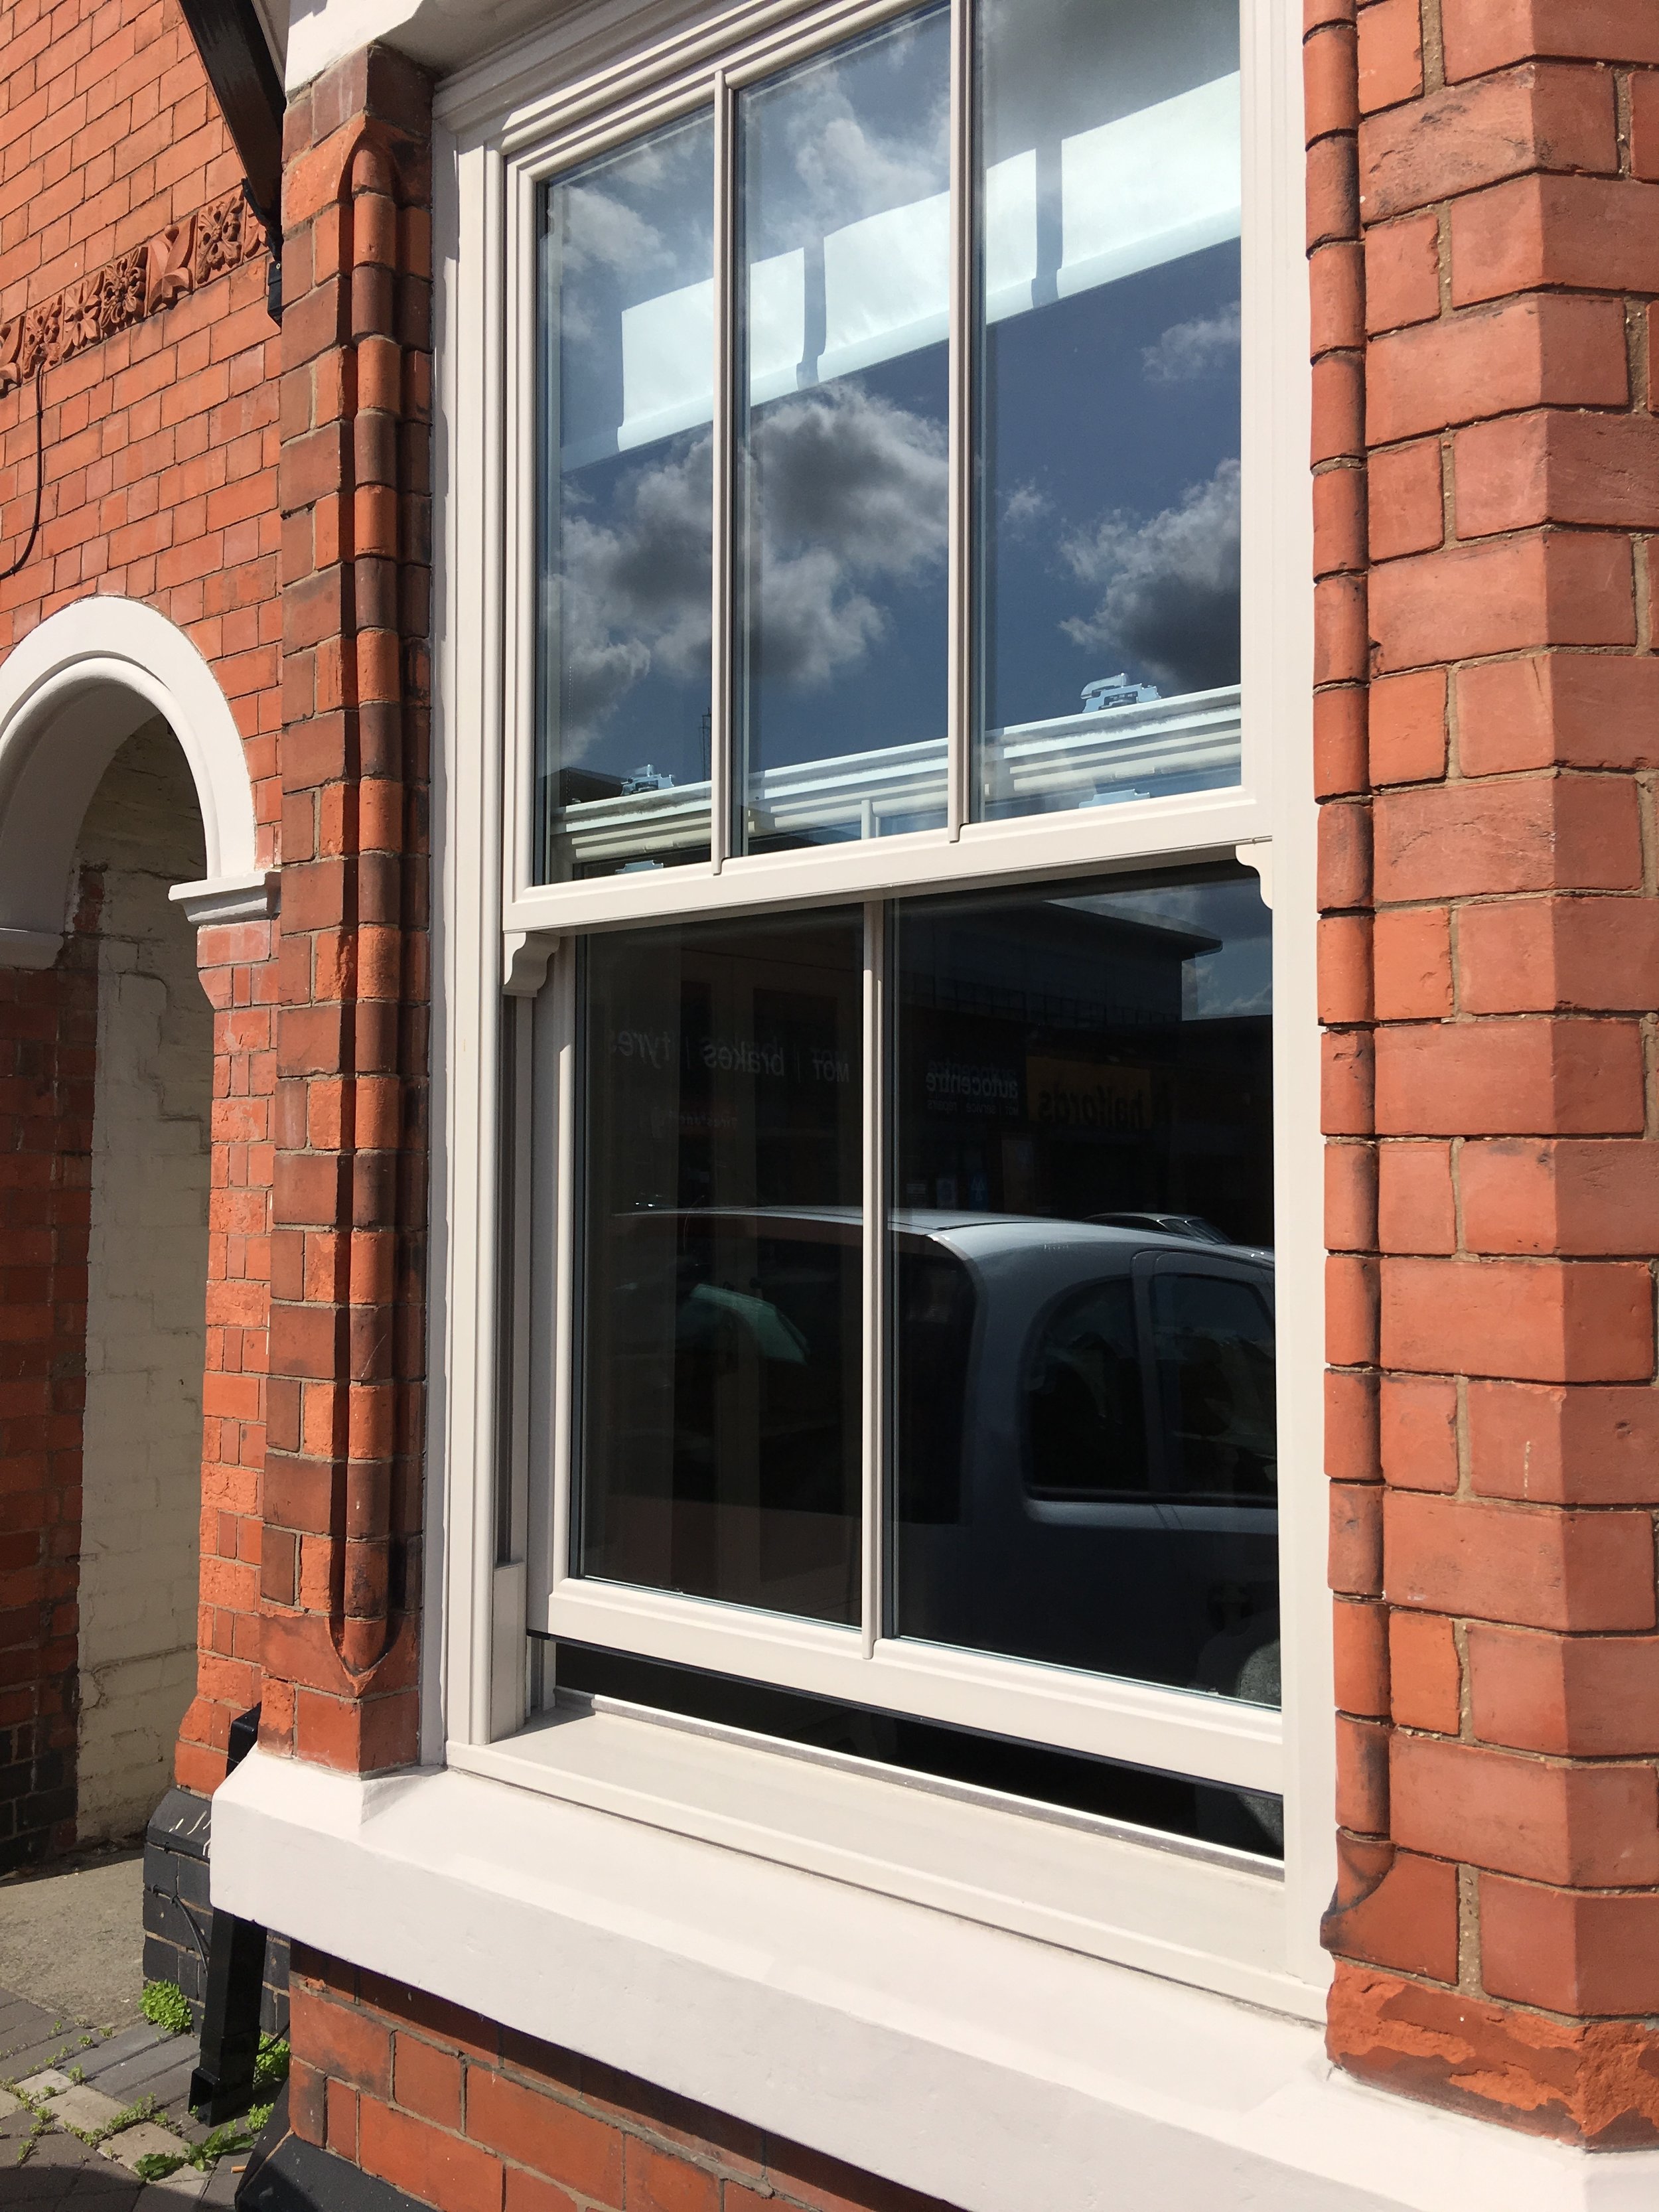
And talking of grey, I'm hearing we're about to get a mid-grey option added to the standard colours available on the elegant Heritage Range sash windows. We now supply and fit these for period homeowners in the Coventry and Warwickshire area and I'm sure mid-grey will be a really popular colour choice as looks great contrasted against brick or rendered finishes. All in all then, it's great news as these are already unbeatable value if you're wanting to transform your period property on a tight'ish budget.

How to fix sash window condensation

Sash Window Condensation is back..

Only late september, and just 5 C  last night in Coventry, but already the depressing bloom of condensation has started forming on single glazed panes of sash windows in period homes throughout our area.

This is a beautiful Victorian semi in Earlsdon that we restored back in 2006; our family home for a few years - but unfortunately we’d kept with the previous owners secondary glazing, which never worked very well

I happened to be driving past early this morning and took these pictures - lots of condensation already appearing on the coldest parts of the glass. We sold the property a while back now but I remember from our time living there, the only way to manage the problem was to keep the windows slightly open at night. 

Condensation forms when air on the inside of the glass reaches the dew point - which for most centrally heated homes is about 12C. Air, saturated with moisture (either from showers, our normal breathing out , or maybe a rainy day when its turned cold in the evening) hits a cold surface.

There are several ways to reduce or stop condensation but the key principal is to either increase the heat (warm air is happy to hold onto moisture longer before dumping it as condensation), or reduce the humidity level (replace moist air with dry air).

Turning up your heating is effective, but not hugely practical, so anti-condensation measures normally concentrate on improving ventilation - as follows;

  • Stop air directly around the window becoming locally too cold or water saturated by opening curtains or blinds slightly

  • Open the window a little to ventilate the room - air inside any property under occupation is almost always more humid compared with air outside. This is moisture from cooking, showers, but also - particularly in bedrooms - from our breathing and perspiration.

  • Check air bricks and open these up if they have been covered - most pre-1920's will have had an exposed air brick higher up on an outside wall to aid chimney ventilation

  • Check unused chimneys to ensure some ventilation is in place (blocked up chimneys should always have small air bricks placed in the room side, with an air cowl fitted to the chimney pot to guard against condensation forming inside the chimney space)

  • Fit a mechanical trickle vent fan, or better still buy a heat recovery vent (hrv) unit. These are really effective but pricey at c.£300 per room and they work by passing the warmer stale air from inside through a heat exchanger that warms the cold air coming in at the same time from outside. HRV's are often referred to as 'anti condensation fans' as they work extremely well - but check the dB value of the trickle setting as the cheaper ones tend to be alot noiser - and not suitable for bedrooms.

  • a slightly cheaper option that we’ve found does a job pretty well, is to go for a good quality humidistat extractor fan - this one from vent axia is excellent as it’s programmable from an app, looks smart, and has a great trickle vent setting that ensures you get regular air changes even on those cold days/nights when there’s no wind around to suck moist air out via regular air bricks or vent grills.

Secondary glazing solutions can work, although personally I'm not a fan as they have to be completely air tight into the room to work effectively - and it's only the really expensive systems that can achieve this. They also don't do much for the aesthetics of a room, and are terribly difficult to keep clean.

Window upgrade systems are sold by various companies as ways to combat condensation; window filming rarely works and looks terrible however carefully it's done, draughtproofing makes you feel warmer but will make condensation problems worse as it's reducing ventilation, and retro-fitting double glazed glass into original timber sashes is eye wateringly expensive as the weighted balance system also has to be changed.

upvc victorian replica sash windows we recently fitted to a property in dudley, west midlands.

upvc victorian replica sash windows we recently fitted to a property in dudley, west midlands.

Tbh though, (and you probably already guessed I’d be saying this!) the only option that really works satisfactorily is to go with good quality replacement upvc sash windows - zero maintenance, condensation and draught free, and able to cope with extremely high levels of moisture and temperature difference inside to out. 

The process is relatively cheap (we charge c. £600 per window) - and it's really easy to get a good looking job, done quickly. Existing sash boxes can be left in situ, with windows specified to pretty much exactly match the period look of your originals.

Use the form below to drop us a line - we’re happy to help with advice even if your’e outside of our Midlands area.

FREE GUIDE: 10 x great makeover tips to boost your home's value

1. Are your WINDOWS up to scratch?

I always concentrate on the front of any house when I'm considering where to start - and you need to too! First impressions are very important, they define immediately how you - and others - feel about your home. Georgian, Victorian and Edwardian architects borrowed heavily from elements of classical design to achieve a balance of proportion using a Golden Ratio (1:1.6) that originated from observing succesful structures forming in the natural world - and window positionings, opening sizes, the spacing of glazing bars and glass area were each carefully combined to create an overall visual impact invariably greater than the sum of the various parts. 

Change any element and things just don't look right anymore.

This is why millions of pre-1920's homes fitted with the first generation double glazed units hugely popular in the 70's/80's/90's, show their age prematurely. Swapping these out for correctly proportioned originally styled windows makes a quite simply astonishing difference to even the most un-loved pre-war terrace. It's relatively quick and cheap to do, and will almost always give you at least an instant 5% up-lift to the value of the property (ask any estate agent!) - quite a tidy sum even for a modest mid-terrace. 

So, nowadays, as long as you don't limit yourself to cheaper, hinged, 'sash lookalikes', and avoid the temptation to call in one of the mainstream upvc suppliers - who commonly charge twice what you should be expecting to pay - replacement windows like our 'Heritage Range' are the no.1 way you can add value and transform your period home.

Inset, and main photo - two bays at a Victorian Mansion property in Coventry, with Heritage Range sash windows installed by AWD Restorations.

Inset, and main photo - two bays at a Victorian Mansion property in Coventry, with Heritage Range sash windows installed by AWD Restorations.

My top tip is to pay particular attention to beadings and architraves - these decorative mouldings form an intrinsic element of the aesthetic look of an authentic period window. In many cases they will have been removed both inside and out when properties had old style double glazing put in - but it's straightforward to have these re-applied, just make sure this is included in the quote you get as many installers won't bother.


TYPICAL COST: £2500 (MID-TERRACE, FRONT ELEVATION) 


2. If you have pebbledashing, think about RENDER.


Many pre-1920's brick built properties had pebbledashing applied way back in the 70's or 80's - then considered to be a cheap low maintenance way to smarten up any tired frontage. Problem is, tastes and thinking have changed, and pebbledashing is now recognised as one off the major 'put-off' factors for any potential purchaser. However, you don't need to despair - flat rendering is an immediate and effective remedial option to consider as it can be applied directly over the existing surface. Again, it's a relatively cheap undertaking compared to the potential uplift in your property's value - and another easy way to achieve major transformation.

Most renders look great without any neccesity for painting, however,  my top tip is to specify 'ashlar' style block markings be applied (rectangles approx 18 inches long x 9 inches high -  as shown in the photo above, taken at a project property in Earsldon we completed in 2006). Your chosen builder/plasterer should be comfortable with this approach as it's not particularly time consuming - just a case of using a level, and marking the outline of the lines lightly with a trowel before the render has gone off completely. 

Ashlar block-marking of render is an authentic technique used widely by Georgian and Victorian builders to give the appearance of real stone blocks when gentrifying streetscapes on a budget - so all in all it's a winner!


TYPICAL COST: £2500 (MID TERRACE) 


3. Why not treat your property to a HOPPER?

Your guttering and downpipes may be functional, but they're probably not doing alot for your property visually. The majority of pre-1920's homes in the UK will have been built with cast iron gutters, hoppers and pipework however these had a nasty habit of blocking up, and rusting, so almost all have shuffled off to the great rubbish bin in the sky to be replaced by asbestos or more recently, plastic versions. Grey plastic downpipes seem to be adorning period properties everywhere across the UK, so much so that it's an aspect that often gets completely overlooked unless there's any obvious problem to attend to.


It's only recently that companies have started offering 'period style' cast iron lookalike fixtures and fittings that mimic the ogee style profiles and decorative features found on original period builds, and this now makes it possible to recreate a striking period enhancement with relatively little effort. I strongly recommend you take time out to shop around because this really is an easy, quick and low cost way to add bucketfuls of transformative period charm. 

My top tip is to combine a very glamorous BRETT MARTIN hopper with black plastic ogee guttering, and square profile downpipe. Brett Martin have a huge range of very reasonably priced cast iron hopper lookalikes made of lightweight plastic, priced from £30-£50 each depending on how fancy/big you want to go - and typically a Victorian or Edwardian mid-terrrace would have one of these positioned at any awkward junction or anomaly in the brickwork (eg. just below a decorative brick course or adjacent to the roof of a bay. My favorite supplier for ogee gutters and square downpipe sections is toolstation.com - they stock the 'aquaflow' range and have a great catalogue and multiple stores. BRETT MARTIN do offer a complete cast iron style guttering and downpipe range but whilst brilliant quality, it's very expensive and a bit trickier to fit. 

A complete gutter and downpipe replacement can be handled by any competent diy'er with a ladder, so it's relatively cheap to find someone to do this for you - just make sure the gutters are positioned so as to make it possible to clean out leaves and debris, and also that sufficient 'fall' is built in to carry away water effectively.


TYPICAL COST: £300-£400 (MID TERRACE)


4. Make the most of your front door, then buy TWO POTS.

This is quite a simple one, but again it's easily overlooked. The impression your front door makes is probably second only to the windows you have on your property; and the average pre-1920's developer/architect invariably put alot of time into designing something that would reflect well on occupants and add to the elegance of the building.

Timber surrounds often deteriorate badly and are removed or replaced with poor copies of the original - give this some thought and pay a carpenter to either rebuild or pretty up with chunky mouldings or new plinths. Many original doors were replaced in the 70's and 80's with mock georgian (fan shaped top skylights), or more recently with polycarbonate insulated versions.

In our opinion there aren't many modern composite doors that do much for your house's value - but this 'Nottingham' door is the exception, one of two elegant styles that we recommend, and fit. 

In our opinion there aren't many modern composite doors that do much for your house's value - but this 'Nottingham' door is the exception, one of two elegant styles that we recommend, and fit. 

Generally speaking, unless you want to go with an up-market composite, or shop around reclaim yards for something original, the best approach is to stick with what you've got and try a few things to 'up' the period elegance. My top tip here is to invest in some good quality period door furniture - letter box, door handle, lock escutcheon, door knocker, door pull etc - (again, toolstation do a good selection - my personal favorite is the fleur de lys cast iron antique black range) and also think about painting the door with a good quality period gloss colour.

Plastic/grp doors can be painted as easily as timber, just ensure that you give the surface a quick rub-over with some light (120 grit/similar) sandpaper so as to give the paint a key. Dulux Heritage Range gloss paint or Farrow and Ball eggshell are excellent choices for covering external plastic surfaces and come in a huge variety of fabulous period colours.

Finally, if youve room to place each side of the door, buy two matching plantpots - chunky terracotta always works well - and put two matching plants in each. It's a bit of a cliche but nothing makes a home more welcoming than a nicely dressed front door!


TYPICAL COST (diy door makeover/pots/plant): £150-£200


5. WROUGHT IRON STYLE RAILINGS

I always consider victorian style wrought iron style fence railings for any property we're renovating - it really adds something to the typical period property and of course, most properties will have had railings installed originally prior to removal to support the war effort or loss due to affects of the weather. The good news is there are now plenty of specialist metalworkers advertising in the local press offering made to measure solutions in most areas around the country so it should be easy to get a reasonable quote if this is something you think may work for you. My top tip is to forego the cost of having the steel 'powder coating' (typically 10% extra) as this invariably fails within 3-5 years and starts flaking off due to the expansion and contraction of the metal in direct sunlight - instead buy a tin of Hammerite and paint it on yourself. This produces a much superior, long lasting finish and is available in several period colours (dark grey/blue is a very handsome choice) - and the slightly globby uneaven effect helps with giving a period look.


TYPICAL COST: £1000-£1500 (MID-TERRACE, WITH SMALL GATE)


6. Period style light fittings with a SCANDANAVIAN twist

may 14 989.JPG

One of my favorite ways to add period elegance to a project without breaking the budget is to try a little mix and match with IKEA products. We have an store here in Coventry so it's easy for me to stroll around thinking up ways to use items creatively. I try to use the same light fittings throughout an entire project, so in a large development with 10 flats and 60 rooms that's alot of potential cost. Again tho, it's possible to add flair and value without breaking the budget, and in this instance my top tip is pairing the arstid wall lamp with the apladen pendant lamp shade to create a chic period style wall fixture that looks a little like a victorian gas lamp. The apladen shade is really pretty, so we've also paired it with thekroby pendant lamp, which has a nice chrome chain and chunky fittings but dull shade. Anything similar to either of these in the Period Homes magazine advertisers listings would be costing £100+.


TOTAL COST: £25 (WALL LAMP), £28 (PENDANT LAMP)


7. Victorian style JELLY MOULD switchplate covers

These are really brilliant, a fantastically clever idea that I've used over and over again in recent developments - Victorian style jelly mould lighting switches that are designed to fit directly over the top of existing white plastic light switches. It takes about 5 minutes to fit them, and looks extremely elegant - the company had a distribution deal a few years back with b&q but couldnt make it work, however, they are now selling stock online at convertaswitch.co.uk. Again, this is a great budget saver that will give your whole house a period 'feel' - reproduction light switches in similar style would cost £45+ from specialist retailers (and take a lot longer to fit).

My top tip is to go for the Georgian style range - they have a limited number of these at only £2.99 (normally £11.99) - and even have a double gang option available.

ps. Enter our competition and you could win a set of 12 of these for your own home - just in time for a pre-Xmas makeover! 


TYPICAL COST: £3-£11 (PER SWITCH)


8. Buy a roll of textured fabric WALLPAPER and be creative..

I came across some amazingly patterned faux fabric wallpaper on display in our local Dulux Decorators Centrea few years ago and couldn't get over how exotic it looked. They must have taken pity on me because a few weeks later I was handed a carrier bag with the display sections rolled up - they were so thick they felt like tapestry. Anyhow I put them in a drawer for a while before coming up with an idea to beautify a little corner of a house we were renovating - three off white doors leading into a new kitchen diner we'd created. Anyhow, (and this is my top tip) we hit on the idea of using the samples as panel inserts in the doorways and stuck them in with paste. It looked great! OK, I didn't pay for it but when I enquired, a whole roll would only have been about £45+vat - enough to cover all the door panels in the house! 


I think the point I'm making here is that wallpaper is often an overlooked resource for creative inspiration. It's a relatively cheap option and decorators shops are filled with the most luxurious sample books - so if you've a panelled doorway give it a try - it's the perfect place for splash of glamour.


TYPICAL COST: £50 (ONE ROLL)


9. THE PERIOD STYLE ROLLTOP BATHROOM

This is a relatively expensive makeover choice, however, I'm often amazed by the money bathroom fitters say clients are spending, so bathrooms are clearly a popular upgrade option. We have installed a dozen or more period style bathrooms in the last few years and I use the same approach to detailing each time as it's quite easy to achieve a great result with the materials and products available today. My top tip is to stay away from the likes of victoria plumb and bathstore and choose one of the many ebay sellers specialising in bathrooms as these are similar styles and quality. We love the'LEGEND' roll top bathroom suite from kbsyorkshire, as this includes a large 1760mm victorian style roll top bath with nice chromed claw feet, an over-bath shower/mixer with bath taps, a large wash basin with pedestal and period style taps, plus a close coupled wc.


Another good tip for complimenting your period bathroom makeover is to use 'underground style' brick tiles - we buy these from B&Q as they are great value and come in white, cream or black. Forget cream, and use white with a few lines of the black along the top of skirtings or underneath coving/dad to add interest and accentuate any period detailing.


Finally, we always add a chrome/enamel victorian style towel radiator as this adds a splash of glamour to any bathroom - and again, if you use ebay, these are a great value makeover option.


TYPICAL COST: £515 (LEGEND SUITE ), TILES (£18/M), TOWEL RADIATOR (£120)


10. Wave goodbye to WHITE

If you look around, you'll notice that something like 95% of all external joinery (and pvc windows) in the UK are white in colour. This 'tradition' is actually quite a 20th century phenomenon, originating from a minor revival of the 'queen anne' style of architecture in the 1910's. Prior to this, almost all windows doors and timber detailing (apart from door surrounds) will have been either painted a dark colour - darkest browns/greens/reds/blues were common - or (more often, as it was cheaper) varnished to mimic the appearance of the more expensive and hardwearing hardwoods - oak or mahoghany.


Many whites today are what is termed 'brilliant white' (aka brightest white) that contain modern materials designed to reflect almost all the visable light spectrum - and these do even less, aethetically, for the period home - so my top tip is to wave goodbye to white. I don't advocate going back to dark colours or woodstains, but try an off white (eg. dulux 'timeless'), or light brown (eg. farrow's mouse's back/elephants breath) /cream and you will be amazed by the transformation. I've used Farrow and Ball, and Dulux Heritage Range paints - and both are a good choice but don't be tempted to buy Dulux paints from B&Q, it's expensive and they don't do the full range of Heritage colours - instead use Dulux Decorators Centre's who will make up whatever you need, and also have match codes for all Farrow and Ball paint shades if you've already set your heart on these. 


ps. if you have white painted external stone cills, or decorative lintel detailing, these will also benefit from a period makeover - acrylic masonary ie. matt finish paint is available in all the Dulux Heritage/Farrow and Ball shades.


COST: £25-£35 (DULUX/FARROW AND BALL 1L)